A few years back, I bought an expensive bike rack, a Thule that had a swing-arm that allowed me to move bikes out of the way when I wanted to open the rear hatch of my FJ Cruiser. It was heavy but it worked, though I didn’t use it as much as I had hoped. Soon enough, it rusted. That was a bummer and was a major factor in selecting a new bike rack. In the coastal environment where I live, I needed something less susceptible to rust. Which,after yet another series of watching YouTube videos and reading Reddit reviews (first the RV, then the bikes, now the bike rack—is that what life is nowadays, watching YouTube and Reddit reviews?) led me to the Quikrstuff Mach 2.0.
Despite the name, the Mach 2.0 is the first product from the company, the “Mach 1.0” seems to be the Quickrack from 1up USA and there is some sort of backstory here, a pissing match between the rack designer and 1up USA, which supposedly led to the new company. I don’t know anything about any of that.
The 1up USA rack is popular. It’s expensive but durable and made mostly of aluminum and stainless steel, so I’ve never seen one rusted. It is made in Wisconsin. You can readily buy them used.
The Mach 2.0 is much the same in terms of construction, aluminum and stainless steel. They are nowhere near as popular as the 1up USA rack—I don’t think I had seen one before purchasing mine. Whereas the 1up USA is expensive, the Mach 2.0 is even more expensive—quite possibly the most expensive bike rack on the market.
The Mach 2.0 is modular. Here is what I have:
The base. This is the part that inserts into your vehicle’s hitch mount. It is also the part that is hinged which, like most “tray-style” bike racks, allows the rack to fold up against your vehicle when not being used to transport bikes.
One Add-On. This is an additional tray for your second bike. It clips into the first and can be locked in place. It seems easy to take off if, for some reason, you want to carry only a single bike for an extended period of time.
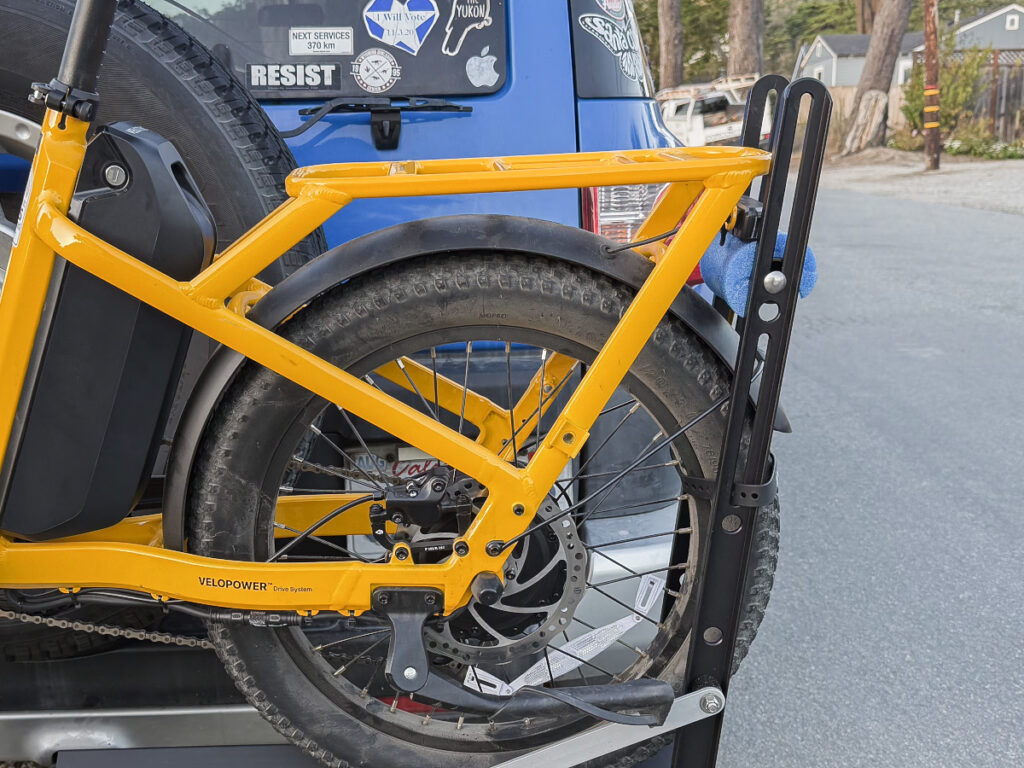
License Plate Bracket. This is a nifty license plate mount that allows you to easily move your vehicle’s rear license plate, which is likely obscured by the bike rack, to a more visible position on the base. The package comes with both the spring-loaded metal edge-frame for the plate and mounts for both the vehicle and the rack. I bought this at the same time as the rack, and so they installed the mounting hardware at no extra cost (it’s automatic—you don’t have to ask for this service). Note that the license plate mount, when mounted to the base of the rack, may appear at first to be obscured by the Add-On≥ It is not. Just walk a few feet away from the rack and you will see the plate clearly visible.
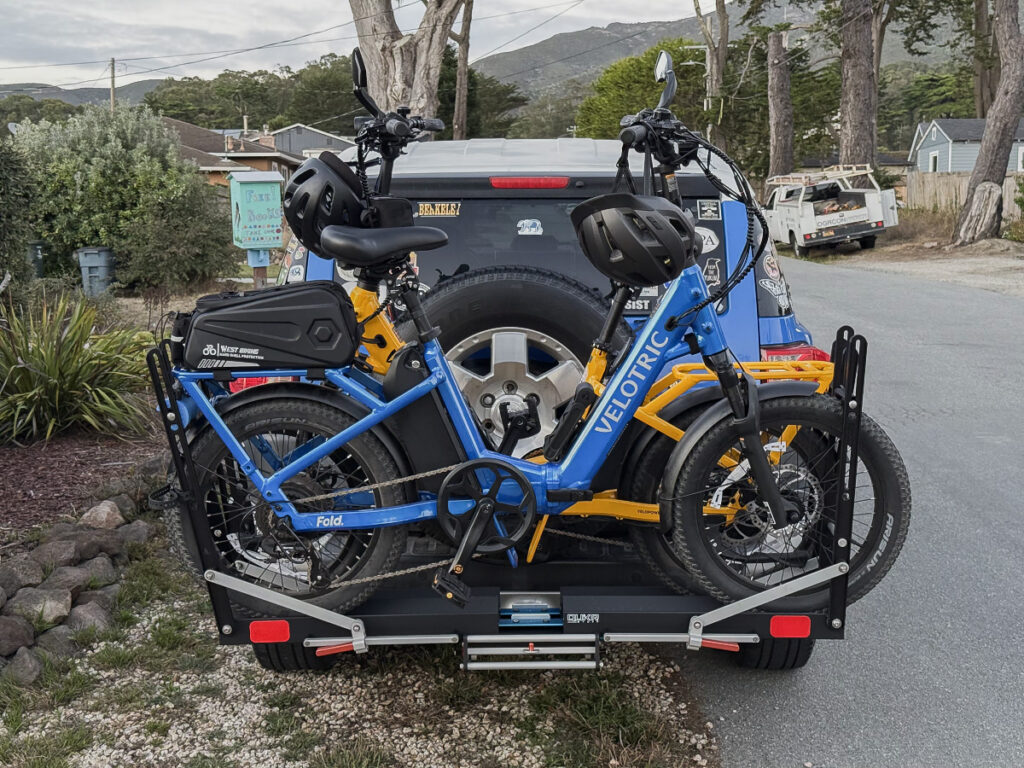
Wheel lock. I ordered two Wheel Locks, which are aluminum rods that fit through the rack’s arms, going between your bike’s wheel spokes, and each is capped with a rather attractively machined sky-blue lock. Ideally, you want to run these through your rear wheel, since the rear wheel is so much more difficult to remove. On my Velotric bikes, the rack’s arm does not come up far enough to allow this to happen, so I use the locks on the front wheels. That offers a limited measure of security and also a good measure of safety—the bike is even more secure from falling off the back.
25” Black Wheel Strap. Our Velotric Fold 1 Plus bikes are not a natural fit for this rack, and I want as much reassurance as possible that, once I mount the bikes back there, I can forget about them until I arrive at my destination. These straps—I bought one for each bike from Quikrstuff—are just Voile ski straps—and so you can probably find them a tad cheaper on Amazon. You cinch down the tires to the rack, preventing any real chance of up and down movement by the bike, preventing it from jumping out of the rack’s tray. I won’t bother using them on short trips around home, but for cross-country trips, or on any trip that will involve a lot of bumpy roads, the straps will be a wonderful anxiety reducer. In fact, I ordered two more, so each tire will have one (I ordered the Titan brand from Amazon).
First impressions—The Good
• It comes fully assembled. You can literally open the box, lift what you see out of the box (cutting a few tie-down straps first) and install it into your car’s hitch. Same for the Add-On. There is zero to assemble.
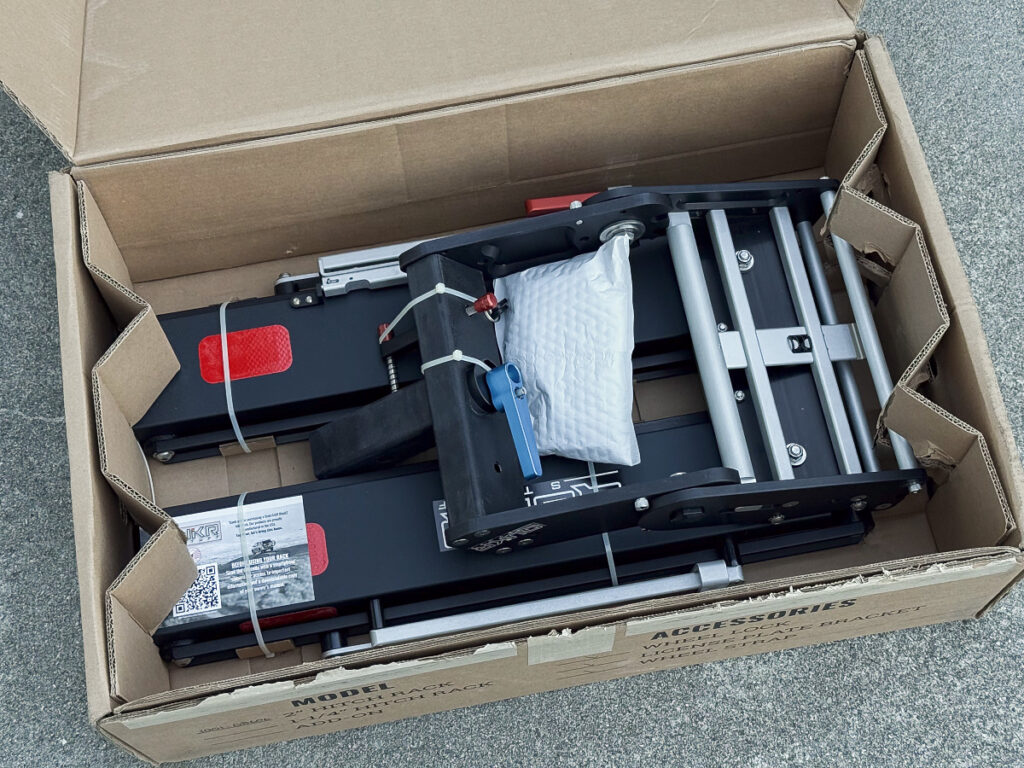
• There are no tools required (other than locks, of course). No hex wrenches, no socket set, no screwdriver. On and off using just their color-coded controls, including securing the rack to the hitch. That’s very cool.
• There’s locks for the hitch’s main lock (to the vehicle), and a lock for your Add-On, and the optional bike locks. If you buy it all at the same time, Quikrstuff automatically keys them all the same, so you can unlock everything with just one key. You still get all of the keys, but they are all the same. If you buy an Add-On or bike lock later, just tell them about your earlier order (or tell them the number on your key) and they will make the new lock(s) and key(s) match the ones you already have.
• The rack is lighter than my old Thule, which I had to sort of lurch along with while I carried it—and I was a younger man then! Being modular is a big help here and the “modules” offer obvious and convenient places to grab hold of the rack when carrying it.
• It’s a good-looking rack. It is black anodized and has large 3M Diamond Grade reflector patches in all the right places. All of the controls that you might touch—the levers and the locks—are anodized in red, blue, and gold, which gives the rack not only a more intuitive level of user-friendliness but a sort of bike-rack-beauty.
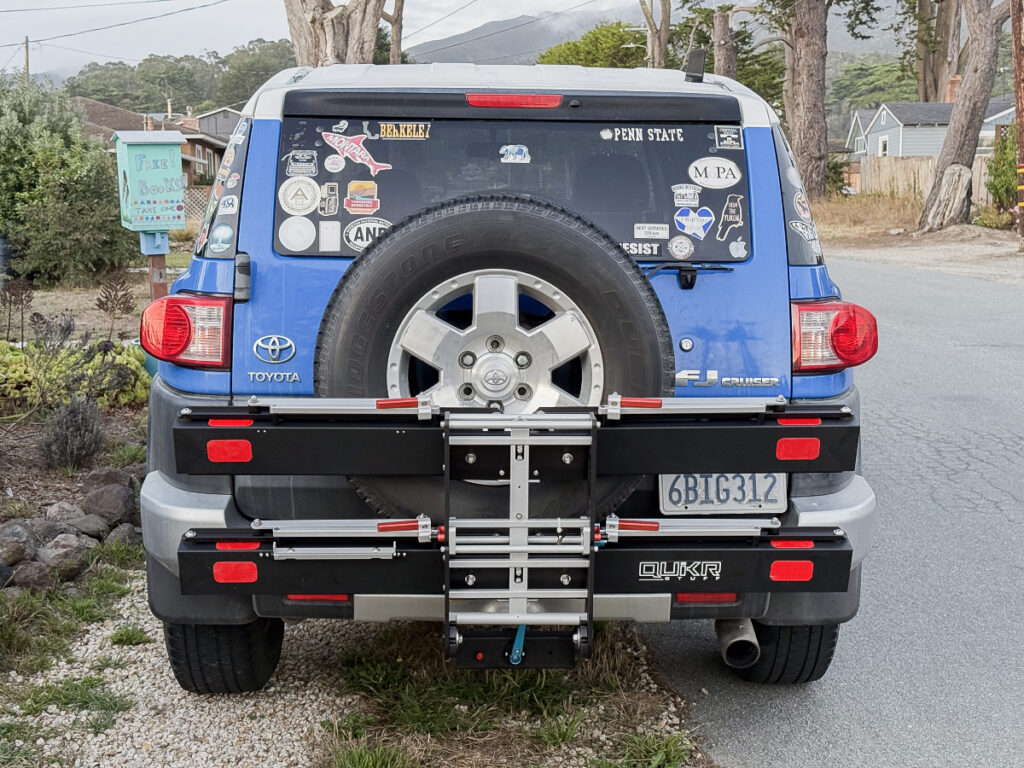
• The License Plate Frame looks like it will work. You can see it in the above photo mounted on the left, on the lower rail.
• When the bikes are mounted, they seem solidly mounted. That’s the whole point, after all. Of course, I will use my Wheel Locks and ski straps for insurance.
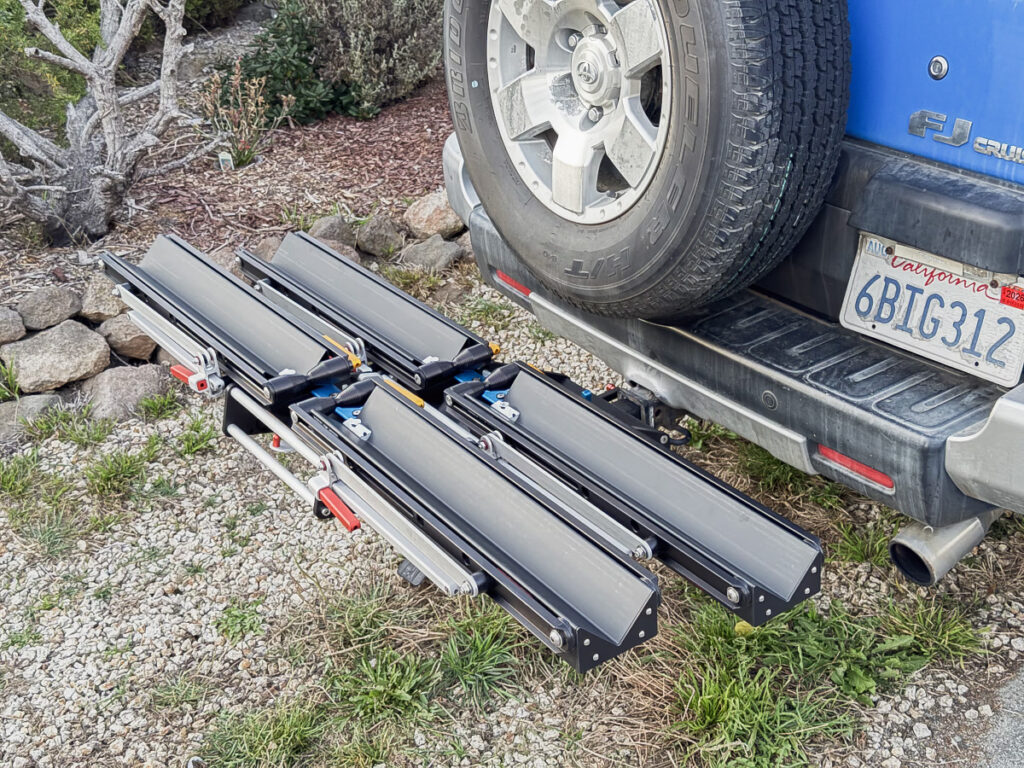
•It folds up. I plan to move my rack often from my FJ Cruiser to my garage and, later, to the Noovo. The Thule and the other racks I’ve seen are bulky and awkward to carry and perplexing to store. The Quikrstuff folds up to not much more than half its fully extended width. Storing the rack seems to be a minor issue.
First Impressions—The Bad
• The most unfortunate part of the Quikstuff so far is that it wasn’t made with my particular style pf bike in mind. The Velotric Fold 1 Plus has twenty-inch tires and fenders on both the front and back. The result is that the rack’s arms, which hold the bike in place, are not pressing against the rear tire in the optimum place. The fender is in the way, and if you press the arm assembly hard up against the fender you will bend it (it is made of metal). There are two general solutions to this problem.
The first (partial) solution is to lower the tire spindle. The rack arm offers a secondary (lower) channel for the tire spool (the part that touches the tire) that allows the spool to be mounted so that it presses the tire in the correct place. All seems well until you try to fold the arms in after removing the bike. When in the upper channel, there is a place for the spool to go when the arms are laid flat. However, when the spool is in the lower channel, there is no place for the spool to go when you try to fold the arm against the rack. You cannot fully close the arms. Not only is this ugly but the slightly raised arms now interfere with the folding of the rack. You cannot fold it the last few degrees because the arms, now sticking up from the rack, touch the vehicle sooner, and thus you cannot reach the correct click-stop. You have to reattach the spool to the higher channel again, just to close the rack, and then, when you return from your ride, move it yet again to the lower channel to press against the bike’s tire correctly. So, your workflow is something like this for a daily bike ride:
Lower rack.
Change the tire spool’s channel to the lower channel.
Mount bikes.
Drive to the destination.
Remove bikes.
Change the tire spool’s channel to the upper channel.
Fold the rack and raise it out of the way.
Ride bikes.
Lower and unfold the rack.
Change the tire spool’s channel to the lower channel.
Mount bikes.
Drive home.
Remove bikes.
Change the tire spool’s channel to the upper channel.
Fold and raise the rack.
The needlessly difficult steps are in italics, if you couldn’t guess. It’s worse than it sounds. Removing the spool and remounting it in the lower channel involves spinning a golden lever until it comes loose, removing and attaching a bolt, and spinning the lever back on—don’t loose the little plastic spacer! Moving the spool back and forth is the most time-consuming step of them all. And you have to do it four times a trip, perhaps at night, perhaps in the rain or cold.
The second way to solve this problem is to buy a piece of foam. Pipe insulation will work. The idea is that, with the foam, you can press the spool against the bike’s fender and hopefully not cause damage to the bike. The tire spool stays in the upper channel and, surprisingly, the arms will close even if the foam is still attached to the spool. All seems well. With the foam I had at home—the standard size, the bike seemed stable, but the spool was pressing not against the tire but against my plastic-housed rear light/turn signal. I’m greatly concerned that on a bumpy road or during prolonged use, the rack will damage the light. One alleviating thought is you don’t need to press the rack’s arm crazy tight against the tire (or my turn signal). A little goes a long way. As of this writing my plan is to go to Lowe’s and buy thicker foam pipe insulation and see if that solves the brake light problem—and if the arm will still close with the foam attached.
Fold arm mechanism. There is a little handle—enough for a finger or two to grab, that you tug on to pull up a locking bar that sits in a clock-stop, holding the rack in place when you rode or lower it. The Add-On has a similar mechanism that locks into the base’s so that the handle to fold the rack is always within easy reach. All sounds good, but the mechanism is extraordinarily hard to use—the metal bar of the release mechanism seems to be binding on the rack’s metal. You pull and pull on that tiny handle and it gives not a bit. The trick seems to be (at least partially) to press against the bikes to lift the rack a tad, to free the bar so that it moves. This works, as far as I can tell at this point, but it is not an elegant solution. Something needs to be redesigned here.
The Ramp. I didn’t buy the Quikstuff ramp. Not only was it nearly $300 but it seems ill-thought-out. I don’t like how the ends of the rack—essentially the same shaped metal as the main rack’s trays—don’t have endcaps. They are just open. Quikrstuff says the metal of the ramp may get scratched without the caps but that, since the caps are metal, they will just get scratched, too. So I wonder—why then include the endcaps on the main rack? In any event, for $15 each, plus screws, you can buy the parts and attach them yourself. I also don’t like that it mounts to the rear of the rack—to the main base or to the Add-On—thereby increasing the distance the rack sticks out from the vehicle. It’s not much weight but I’m thinking of whether a driver behind me will see that extra extension (even with reflectors) and the greater difficulty I might have in parking lots. Why not mount it underneath? Or between the base and the Add-On? Or maybe make it collapsible so I can toss it in the vehicle? A better solution is required, and one that is treated as an equal with the rest of the rack.
So those are my first impressions. A mixed bag at this point, to be sure but I’m still confident that I can finagle things to make it all work and work well. I’ll keep you posted.