

My kids already know it and my wife already knows it, but it has to be said: I don’t know what I’m doing. Here is yet another example.
The Noovo Plus is a beautiful van. Its beauty is on the surface—walnut and soft green cabinetry, cream lounge cushions, a heavy walnut-stained lounge table, the textured wall fabric and flooring, the curves of the wood. It’s lovely to look at, it’s lovely to live in.
There’s more beauty deep down. Open the electrical cabinet and instead of an RV-industry standard rat’s nest, you see a beautifully laid-out racetrack of wires and cables, color-coded boxes and switches. I don’t know an ohm from a watt, and yet when I open the bench lid that hides the racetrack, I almost feel a kinship, a feeling of connectedness amongst all of those connections.
There’s a beauty, too, in the care with which everything has been designed, the way everything has been thought about. This is no artifact of some Jony Ive cult, worshiping a vision of Design without much regard to actually using the thing, but a design that wants you to drive in the van, a design that wants you to sleep in the van, a design that wants you to live in the van.
You can fall in love with a van like this, become obsessed with a van like this. I wouldn’t be surprised if it was common for a person, stopping by a random van show for a burger and a walk around, ending their day immersed in their own inner Vanapocalypse Now, fantasizing of calling their bank, their real estate agent, and their closest family members, telling them all to Sell the house. Sell the car. Sell the kids. Find someone else. Forget it. I’m never coming back. And off they go in their Noovo. (At least that is what they imagine in the moment—Noovos are sold out many months in advance.)
I get it.
But there is one flaw, a flaw so glaring (this is a pun, as you will see) that I am stupefied with astonishment each time I extend our van’s awning and turn on its built-in light. The LED strip runs the length of the awning and illuminates a large patio area—wonderful for hanging out at night or meeting friends. But the LED that comes with the van—installed by awning-maker Gerard—is bluer than ice, colder than steel, the lighting of some Arkham hospital or snowed-in hedge maze at night. It’s ghoulish and ghastly and surprisingly few people seem to notice or care.
I noticed and I cared, and I changed the light, replacing the factory-installed LED strip with a warm-white strip, its color matching the color of the van’s interior lights, its color much more appropriate for a relaxing evening next to the fire, a color that accentuates the beauty of the van.
Changing the light is easy. It would have been easier if I had any idea at all about what I was doing.
Here’s a step-by-step guide to how I did do it, in the order that I should have done each step rather than in the order I actually performed each step. I also note areas for improvement and these are important to carefully consider.
First: Your motivation
Ghastly blue LED Light
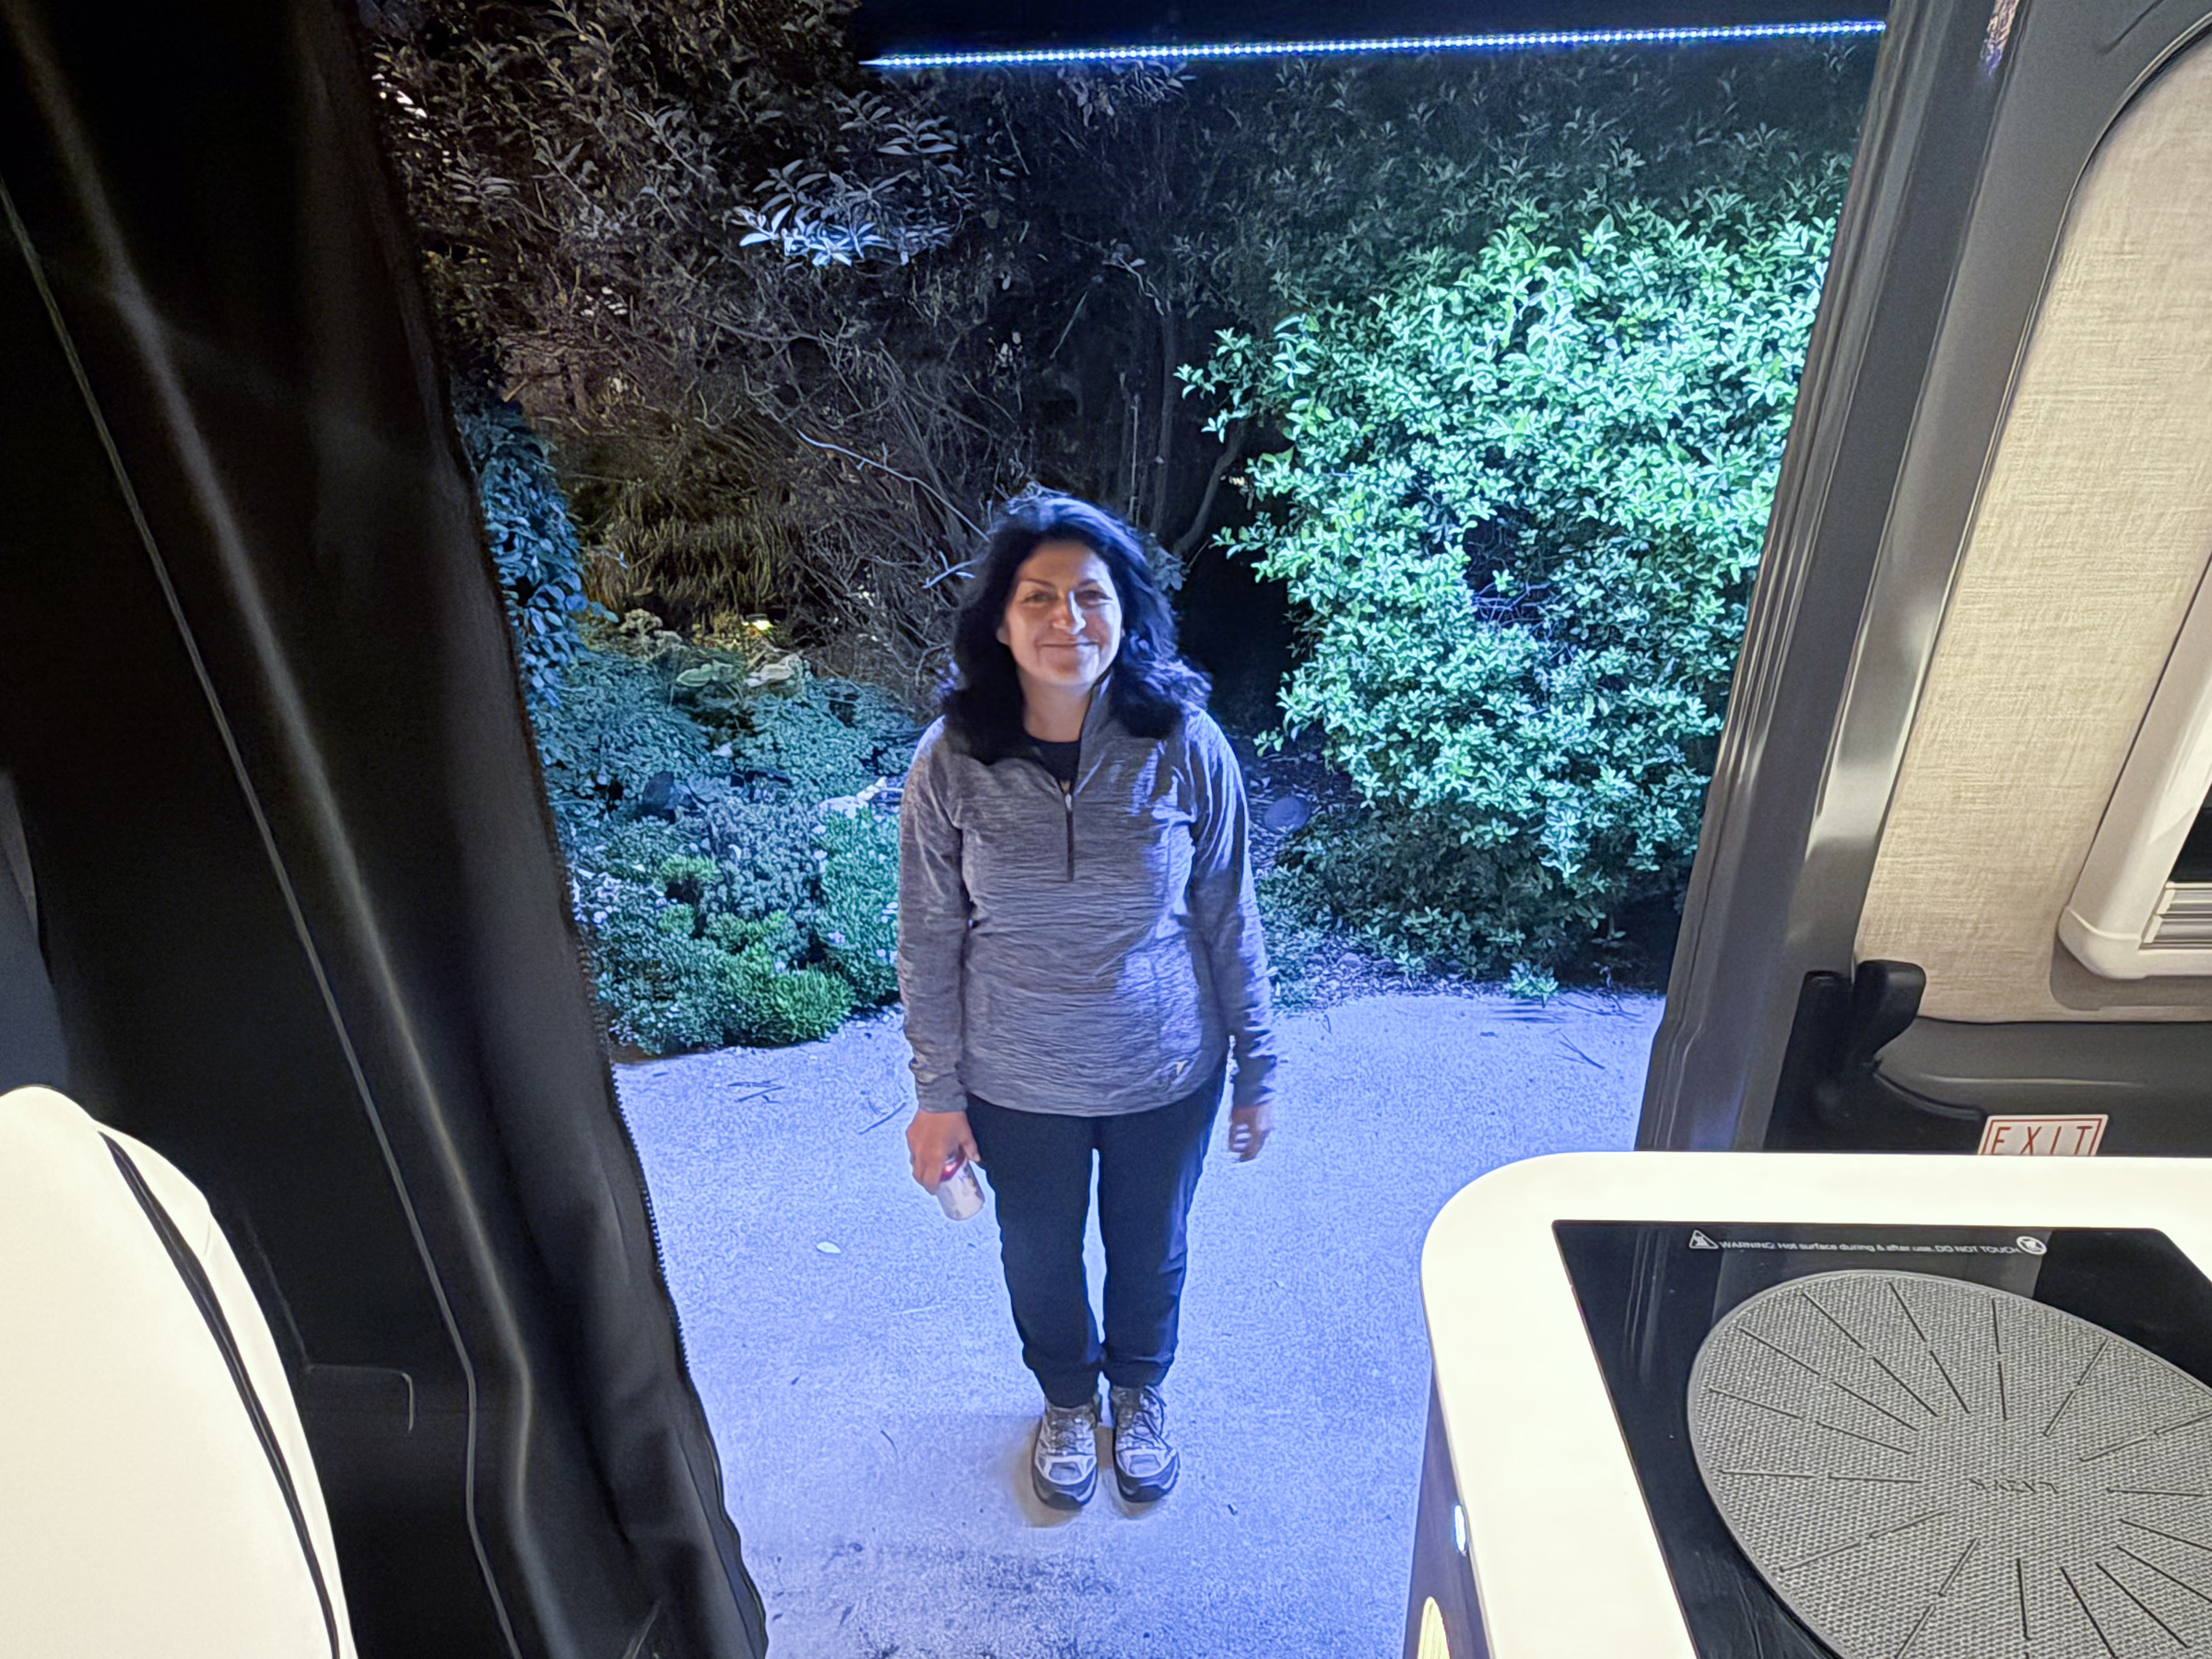
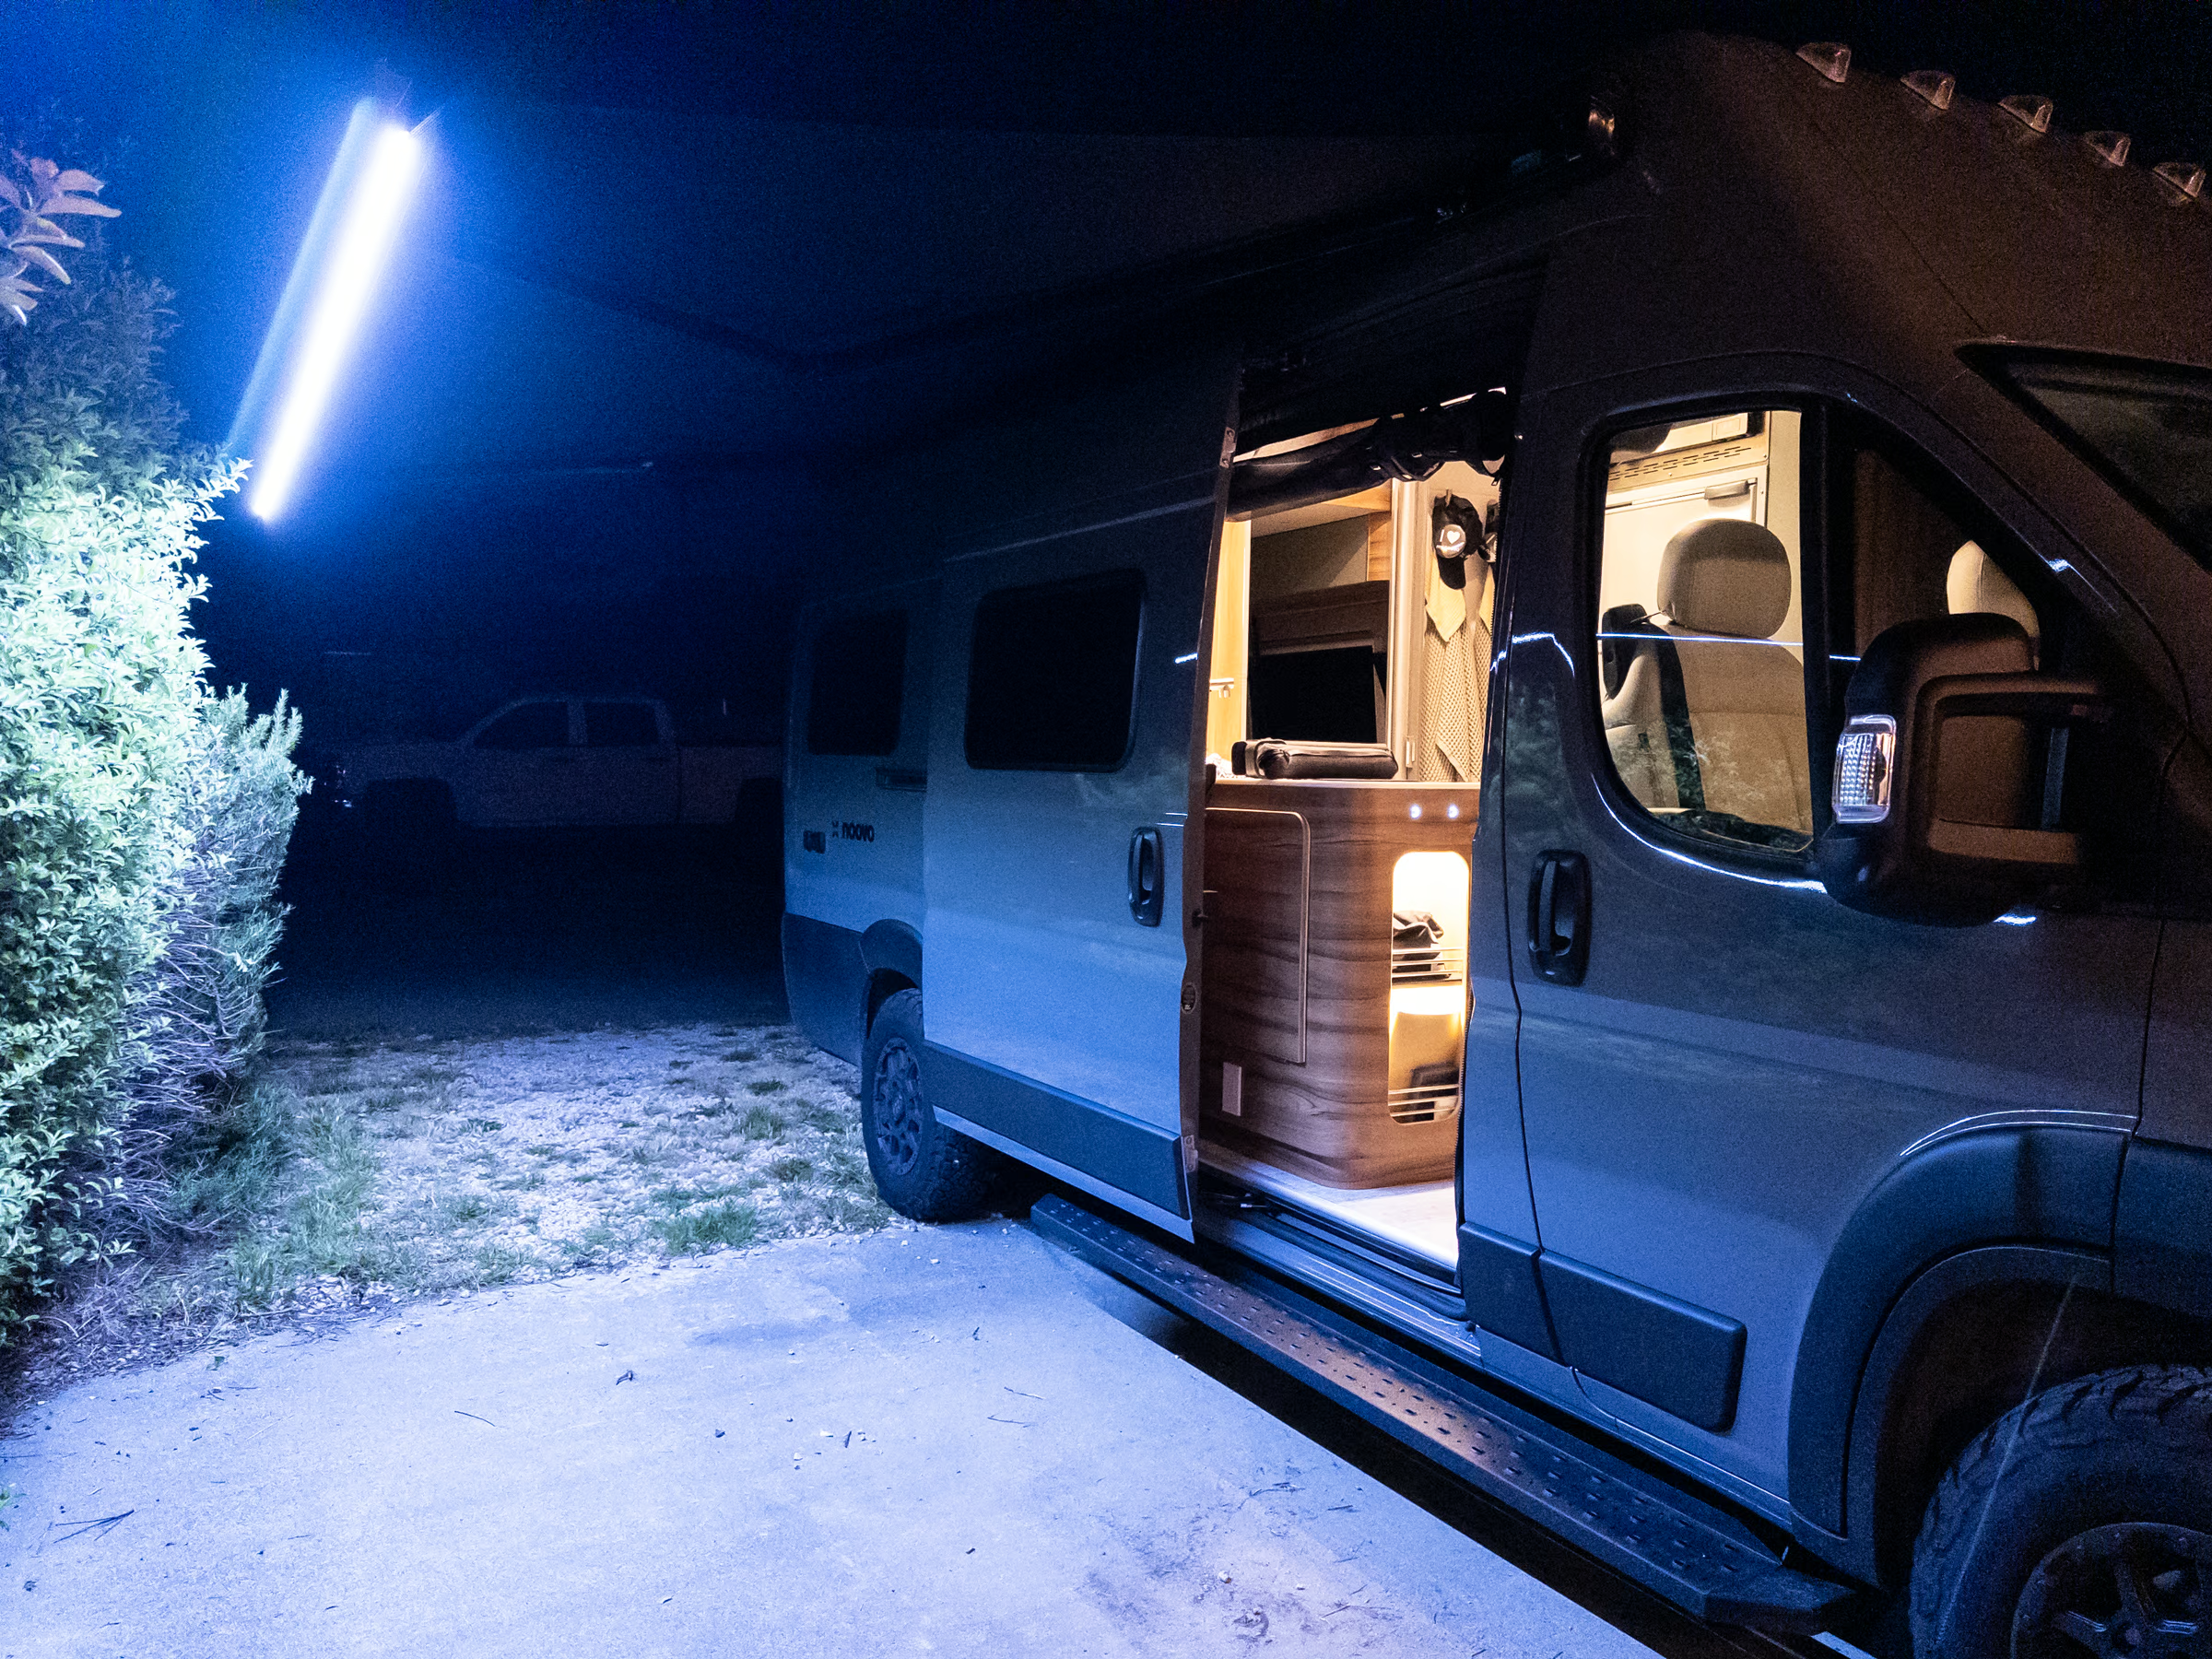
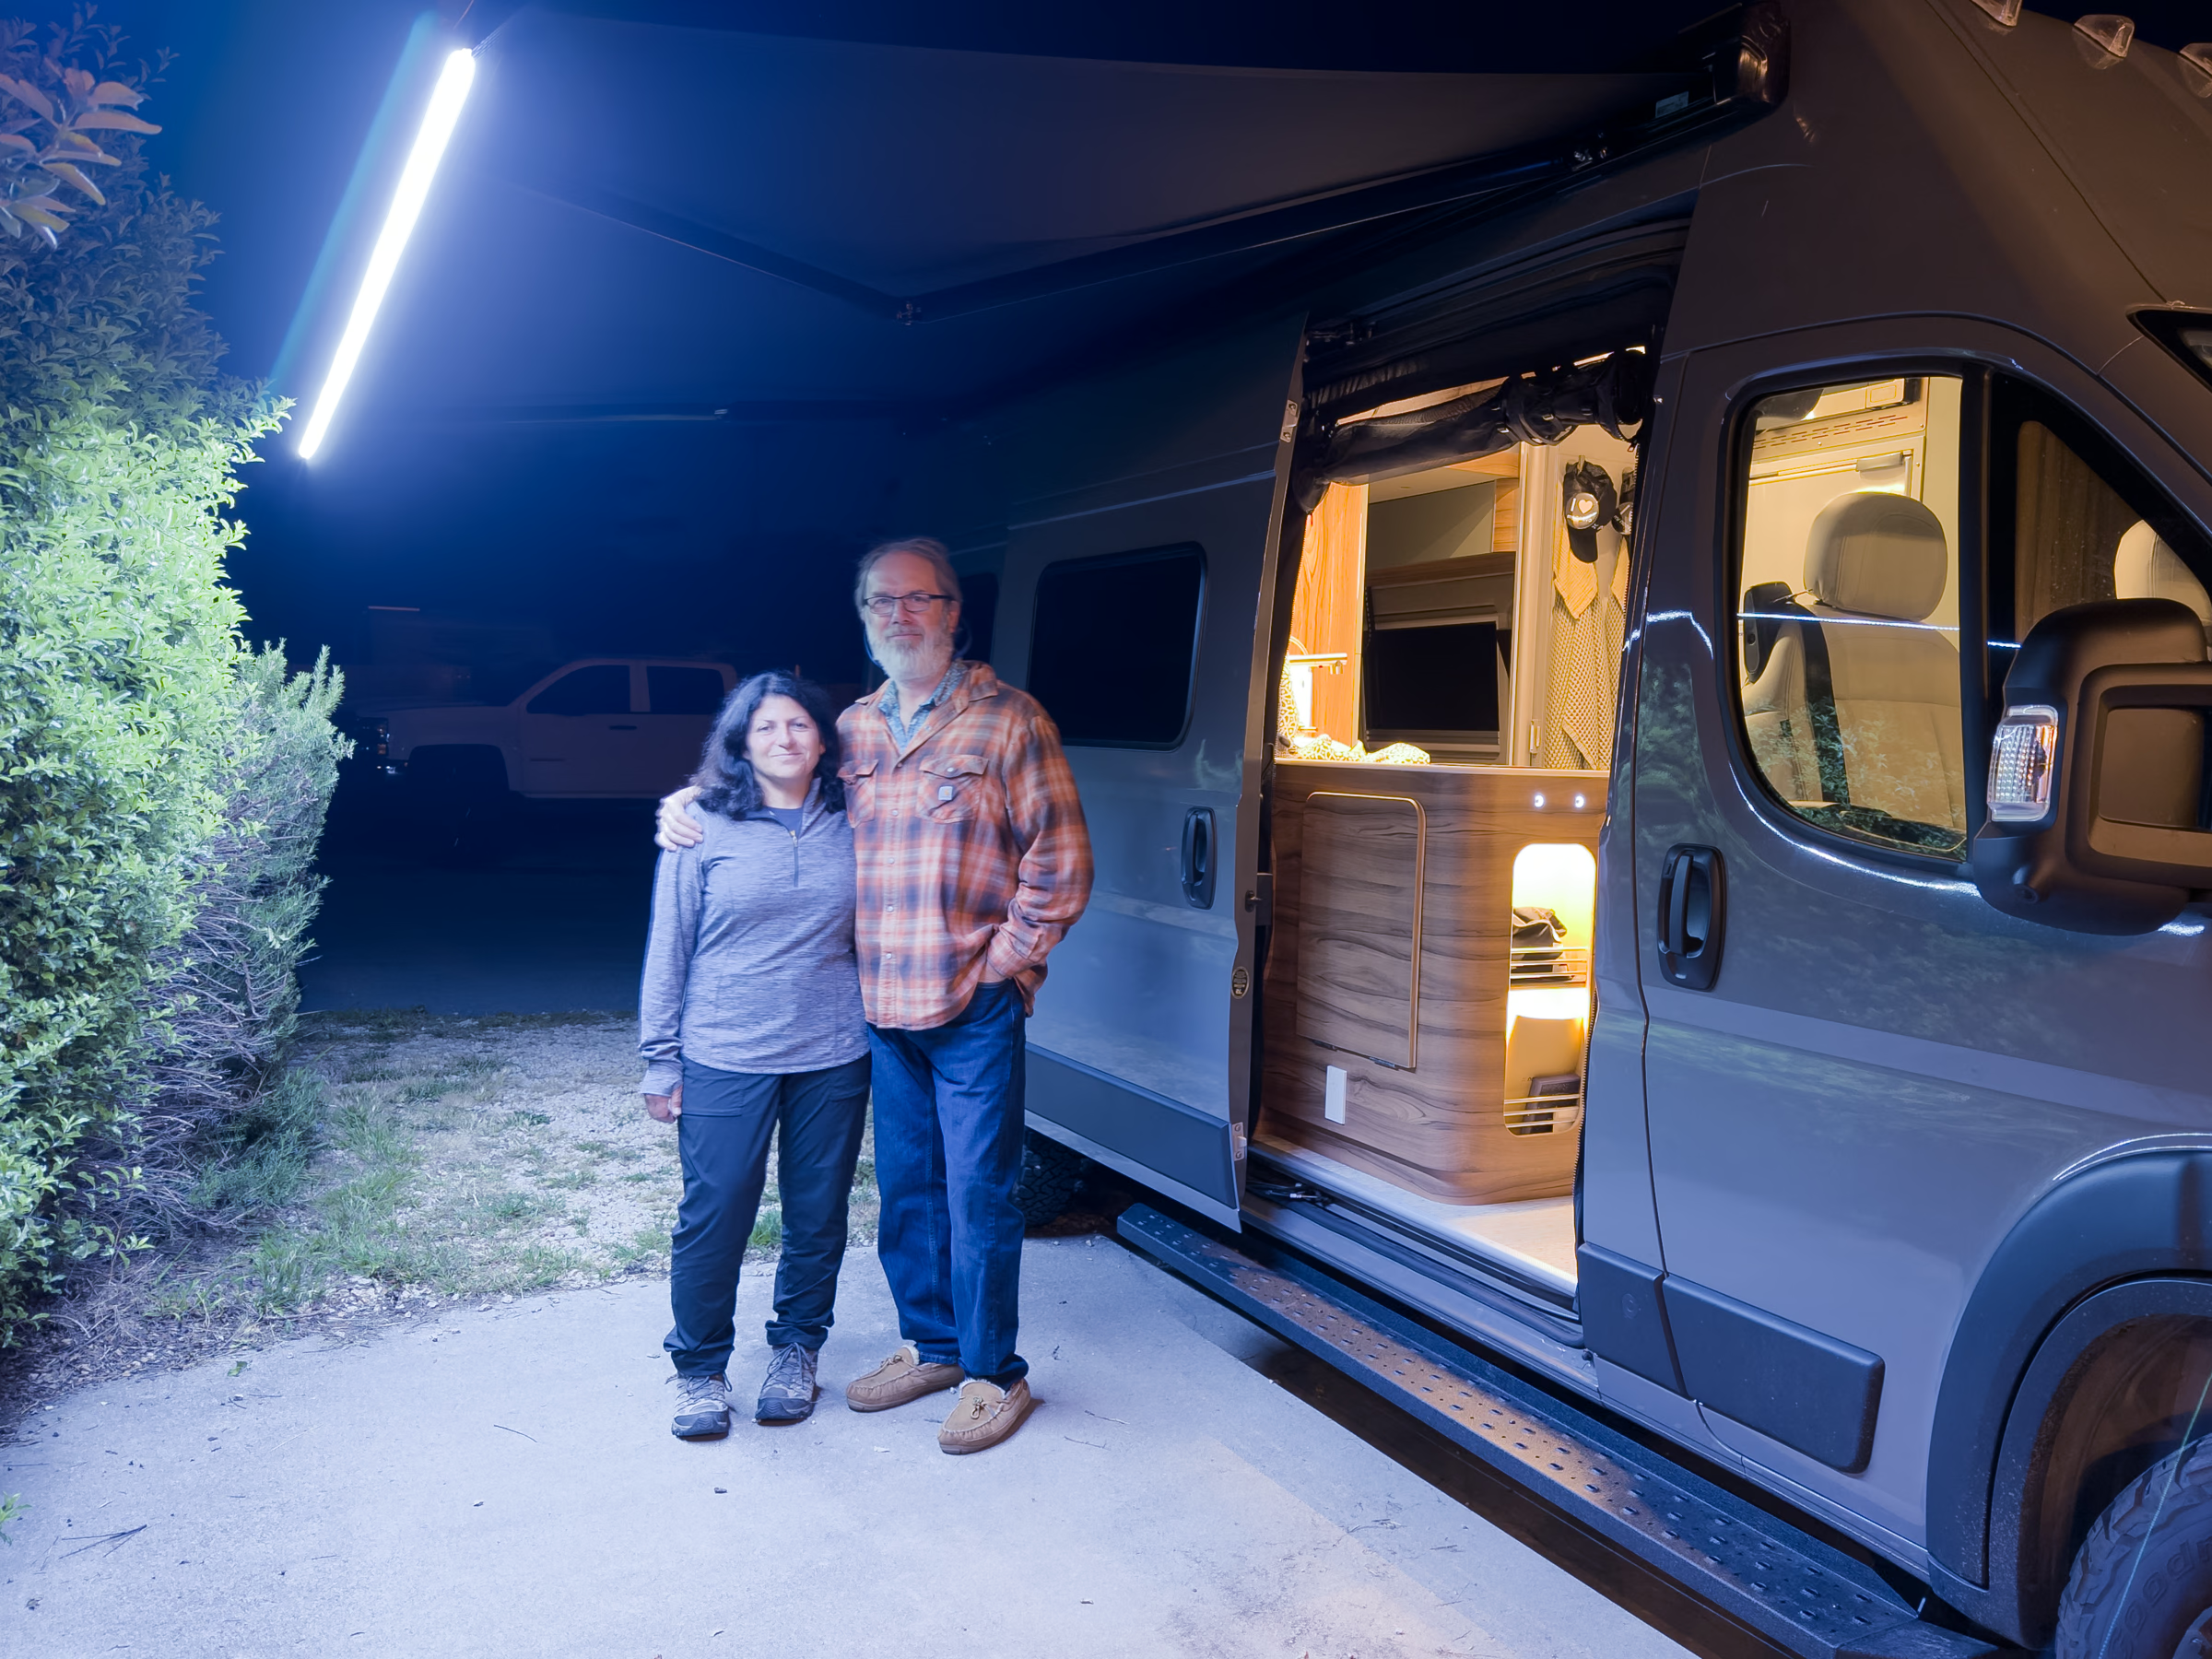
Click on the photos to enlarge them. Look at them closely. In the first one you can see Lori standing outside of the van, me inside shooting the photo. See how the white countertop is a warm white? That’s the color of the interior light. Now note the color of the normally neutral driveway–it’s a pronounced blue. That’s the color of the factory LEDs. Your eyes will try to adjust for the blue if you stand out there long enough, but it still looks ghastly. You just don’t mind it as much.
Stay with the first photo. Look at Lori’s face. The left side of her face (from our point of view) has good skin tones. That’s because it is lit primarily by lights on our garage, which are warm white. The light in the front of her face is mostly coming from inside the van (that same warm white) with a little bit of reflection of the awning LEDs off the van exterior. Skin tones are ok but not great. Now, the right side of her face is lit almost entirely by the awning’s factory LEDs. A ghastly blue.
The next two photos show the same sort of thing–the exterior light is drastically different than the interior lights. Not good.
Beautiful warm LED Light
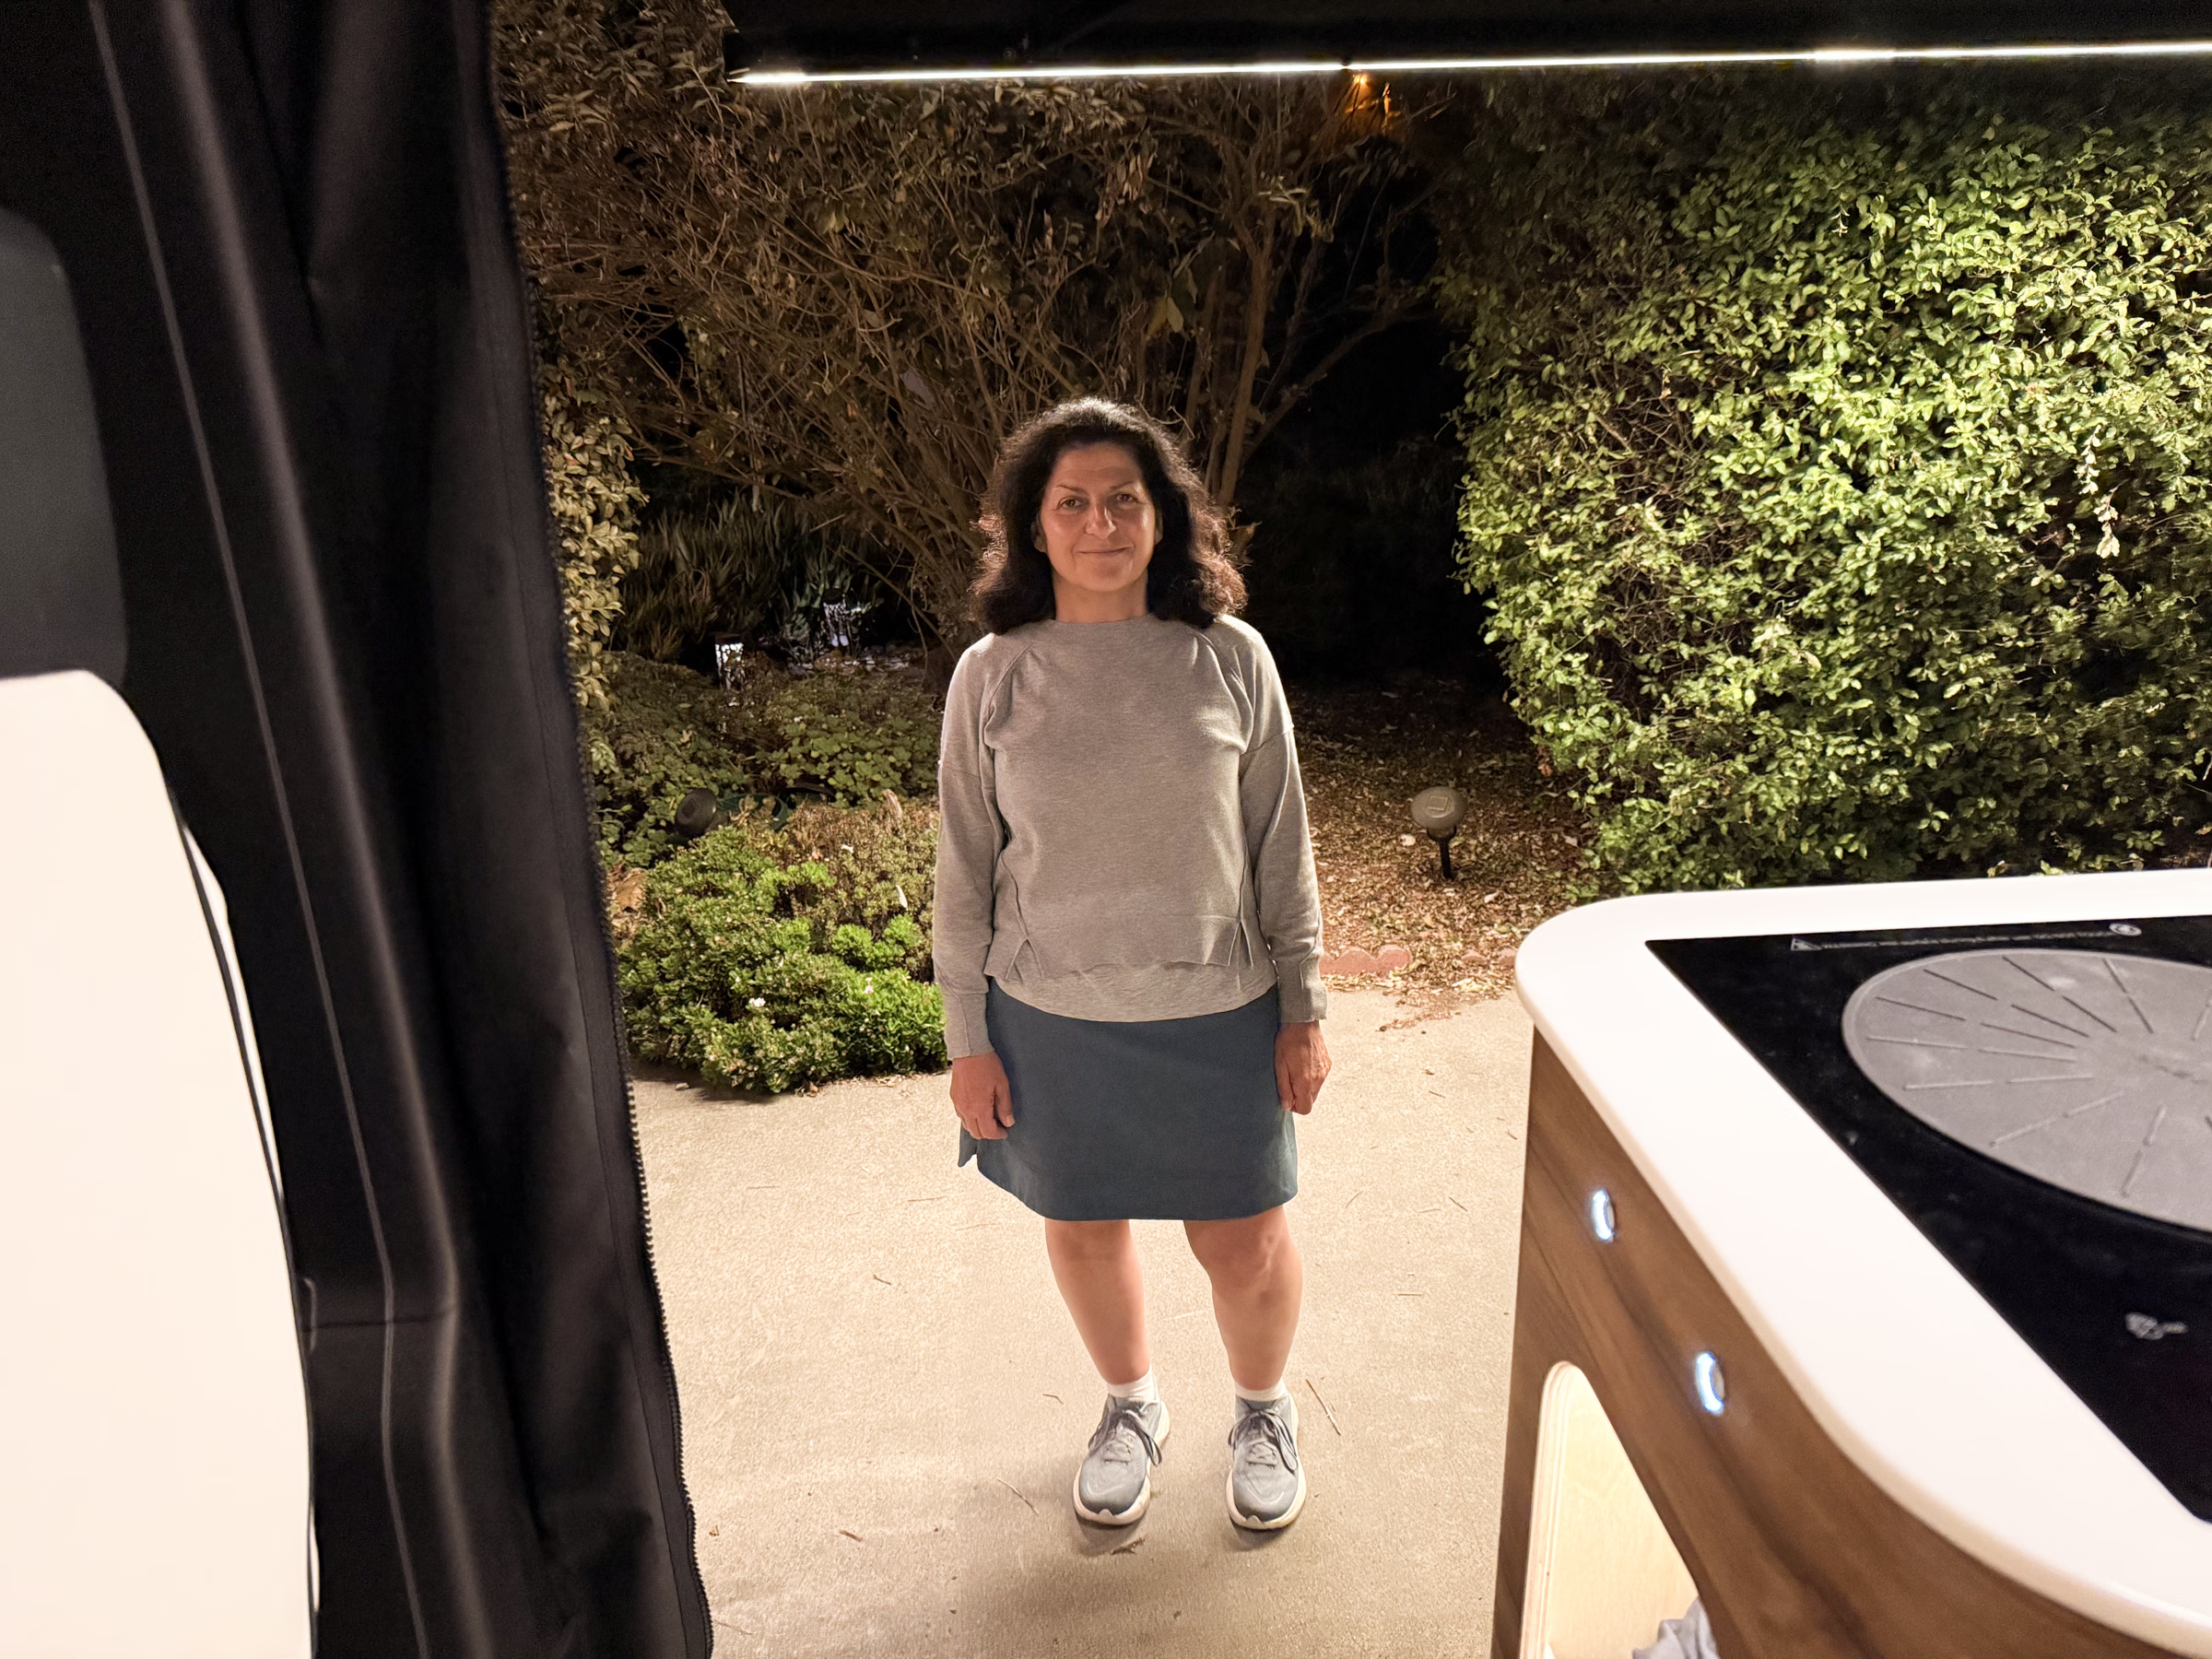
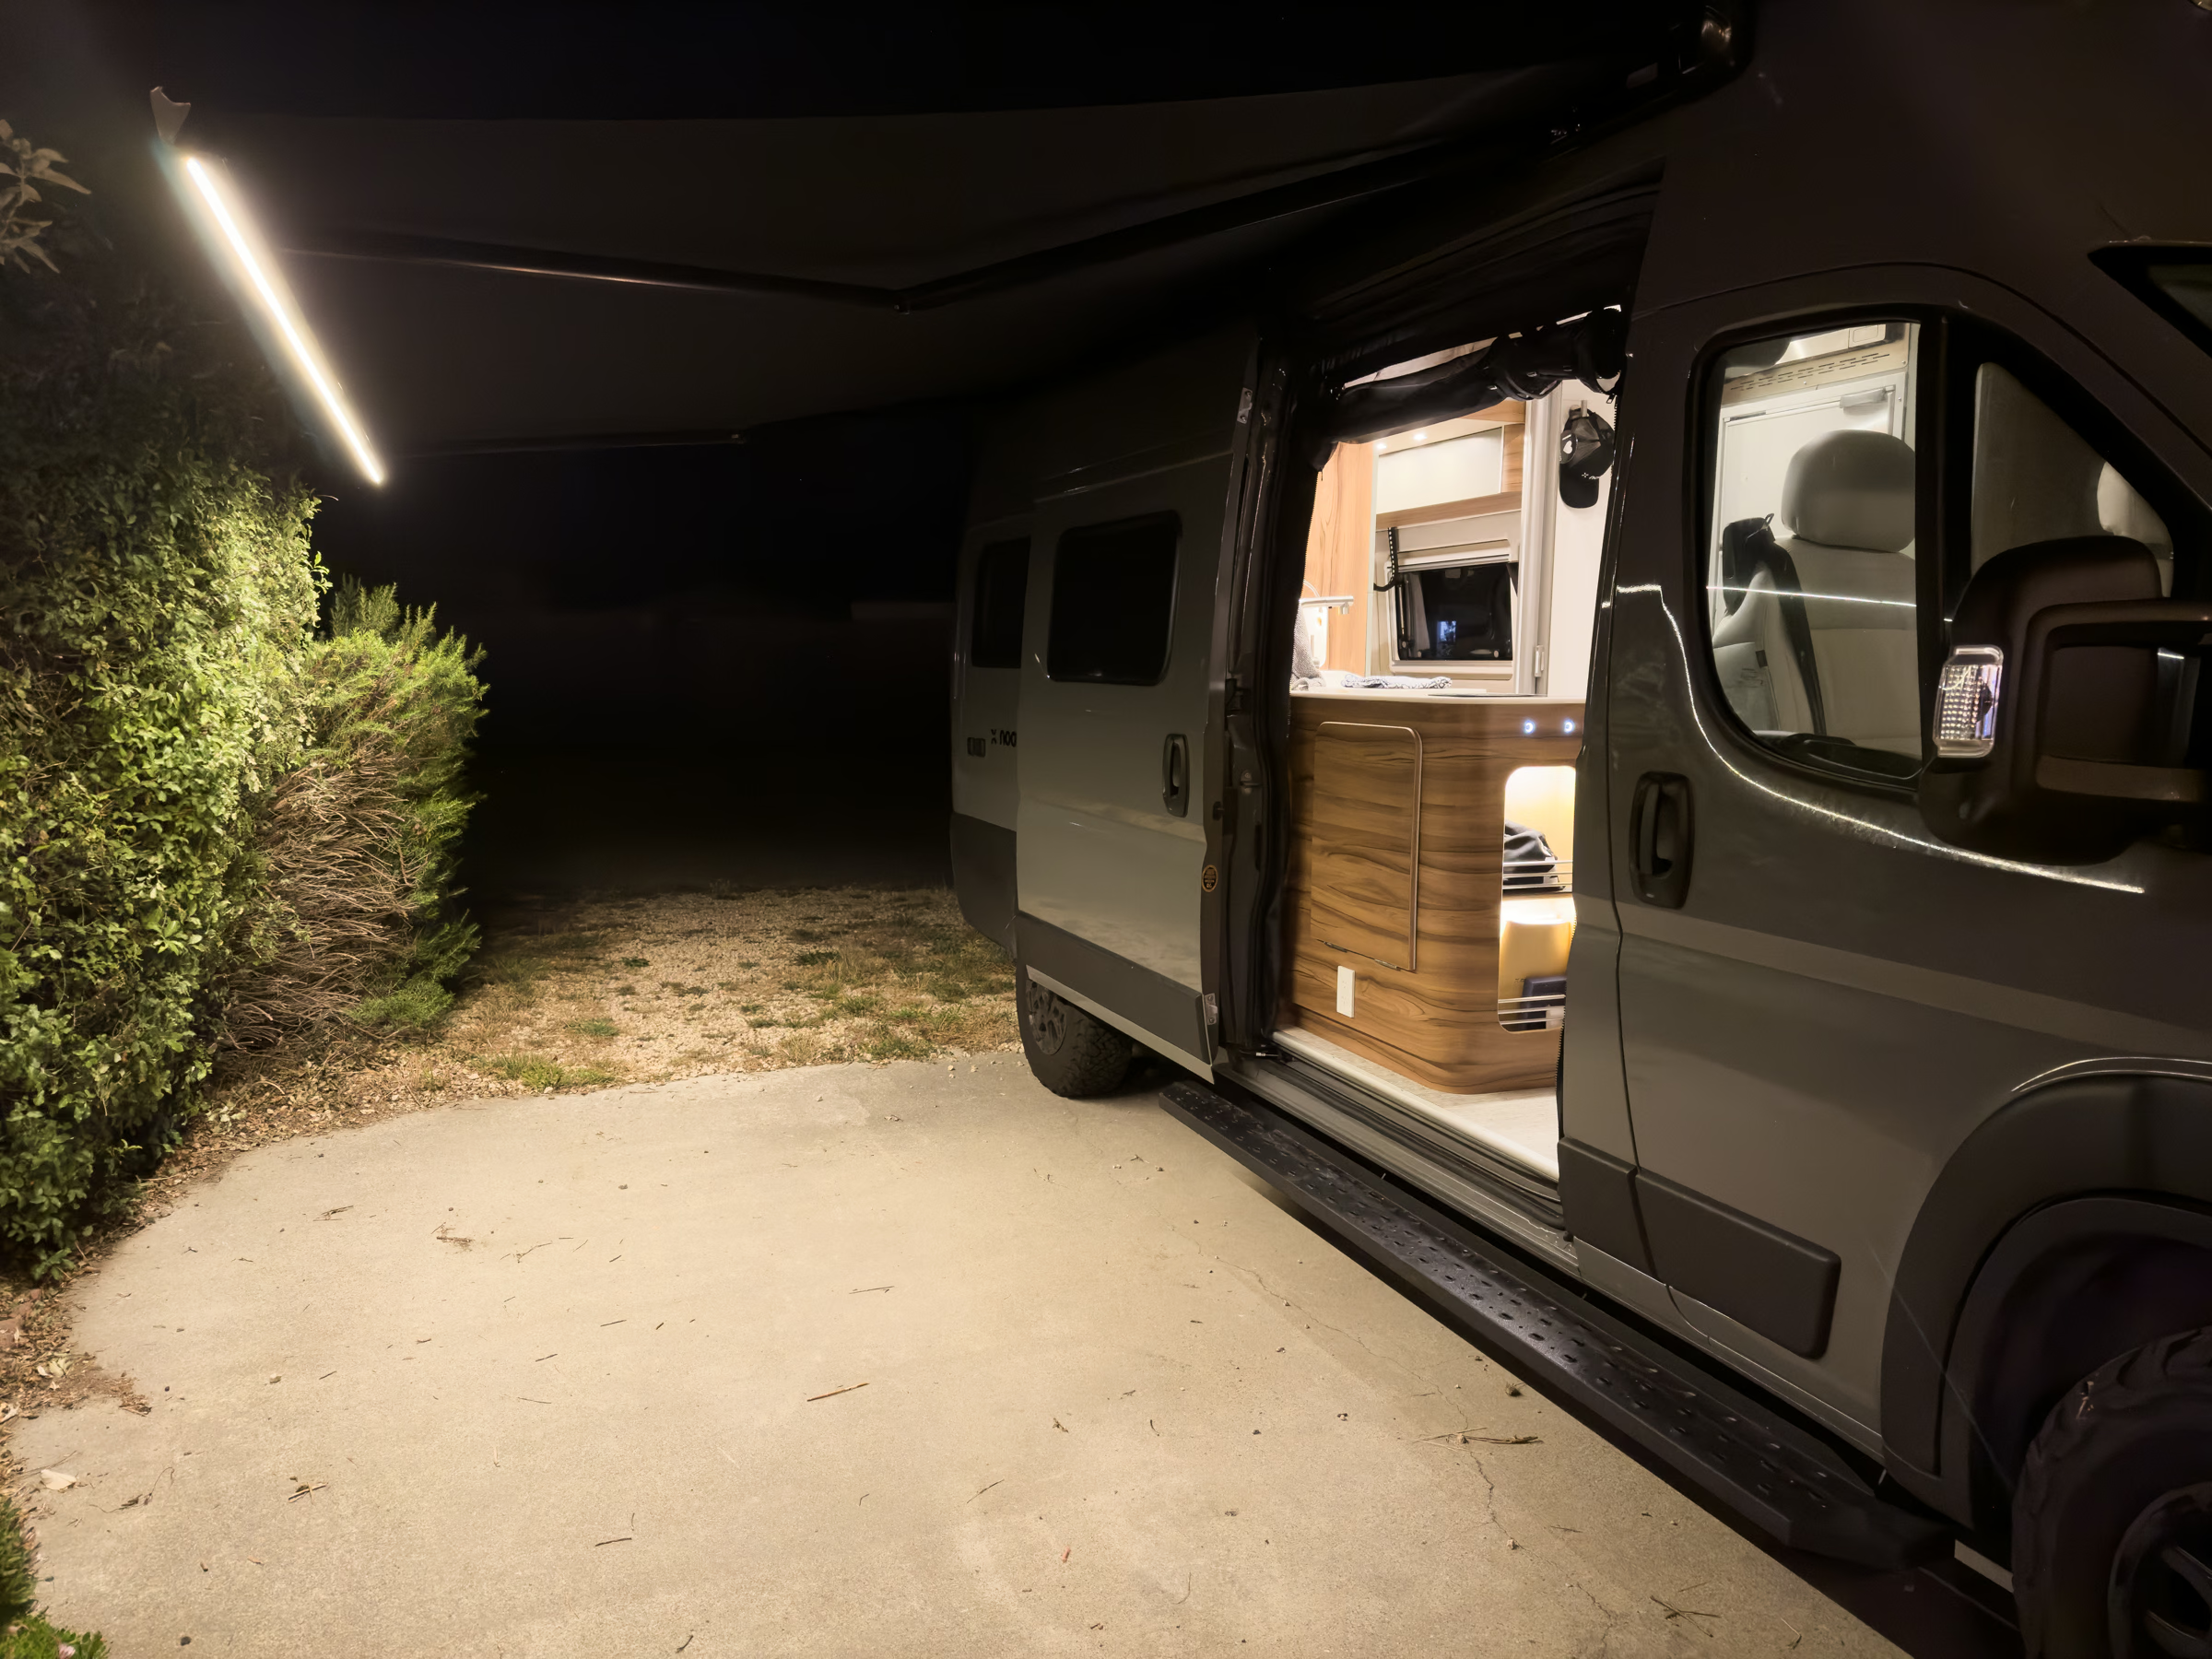
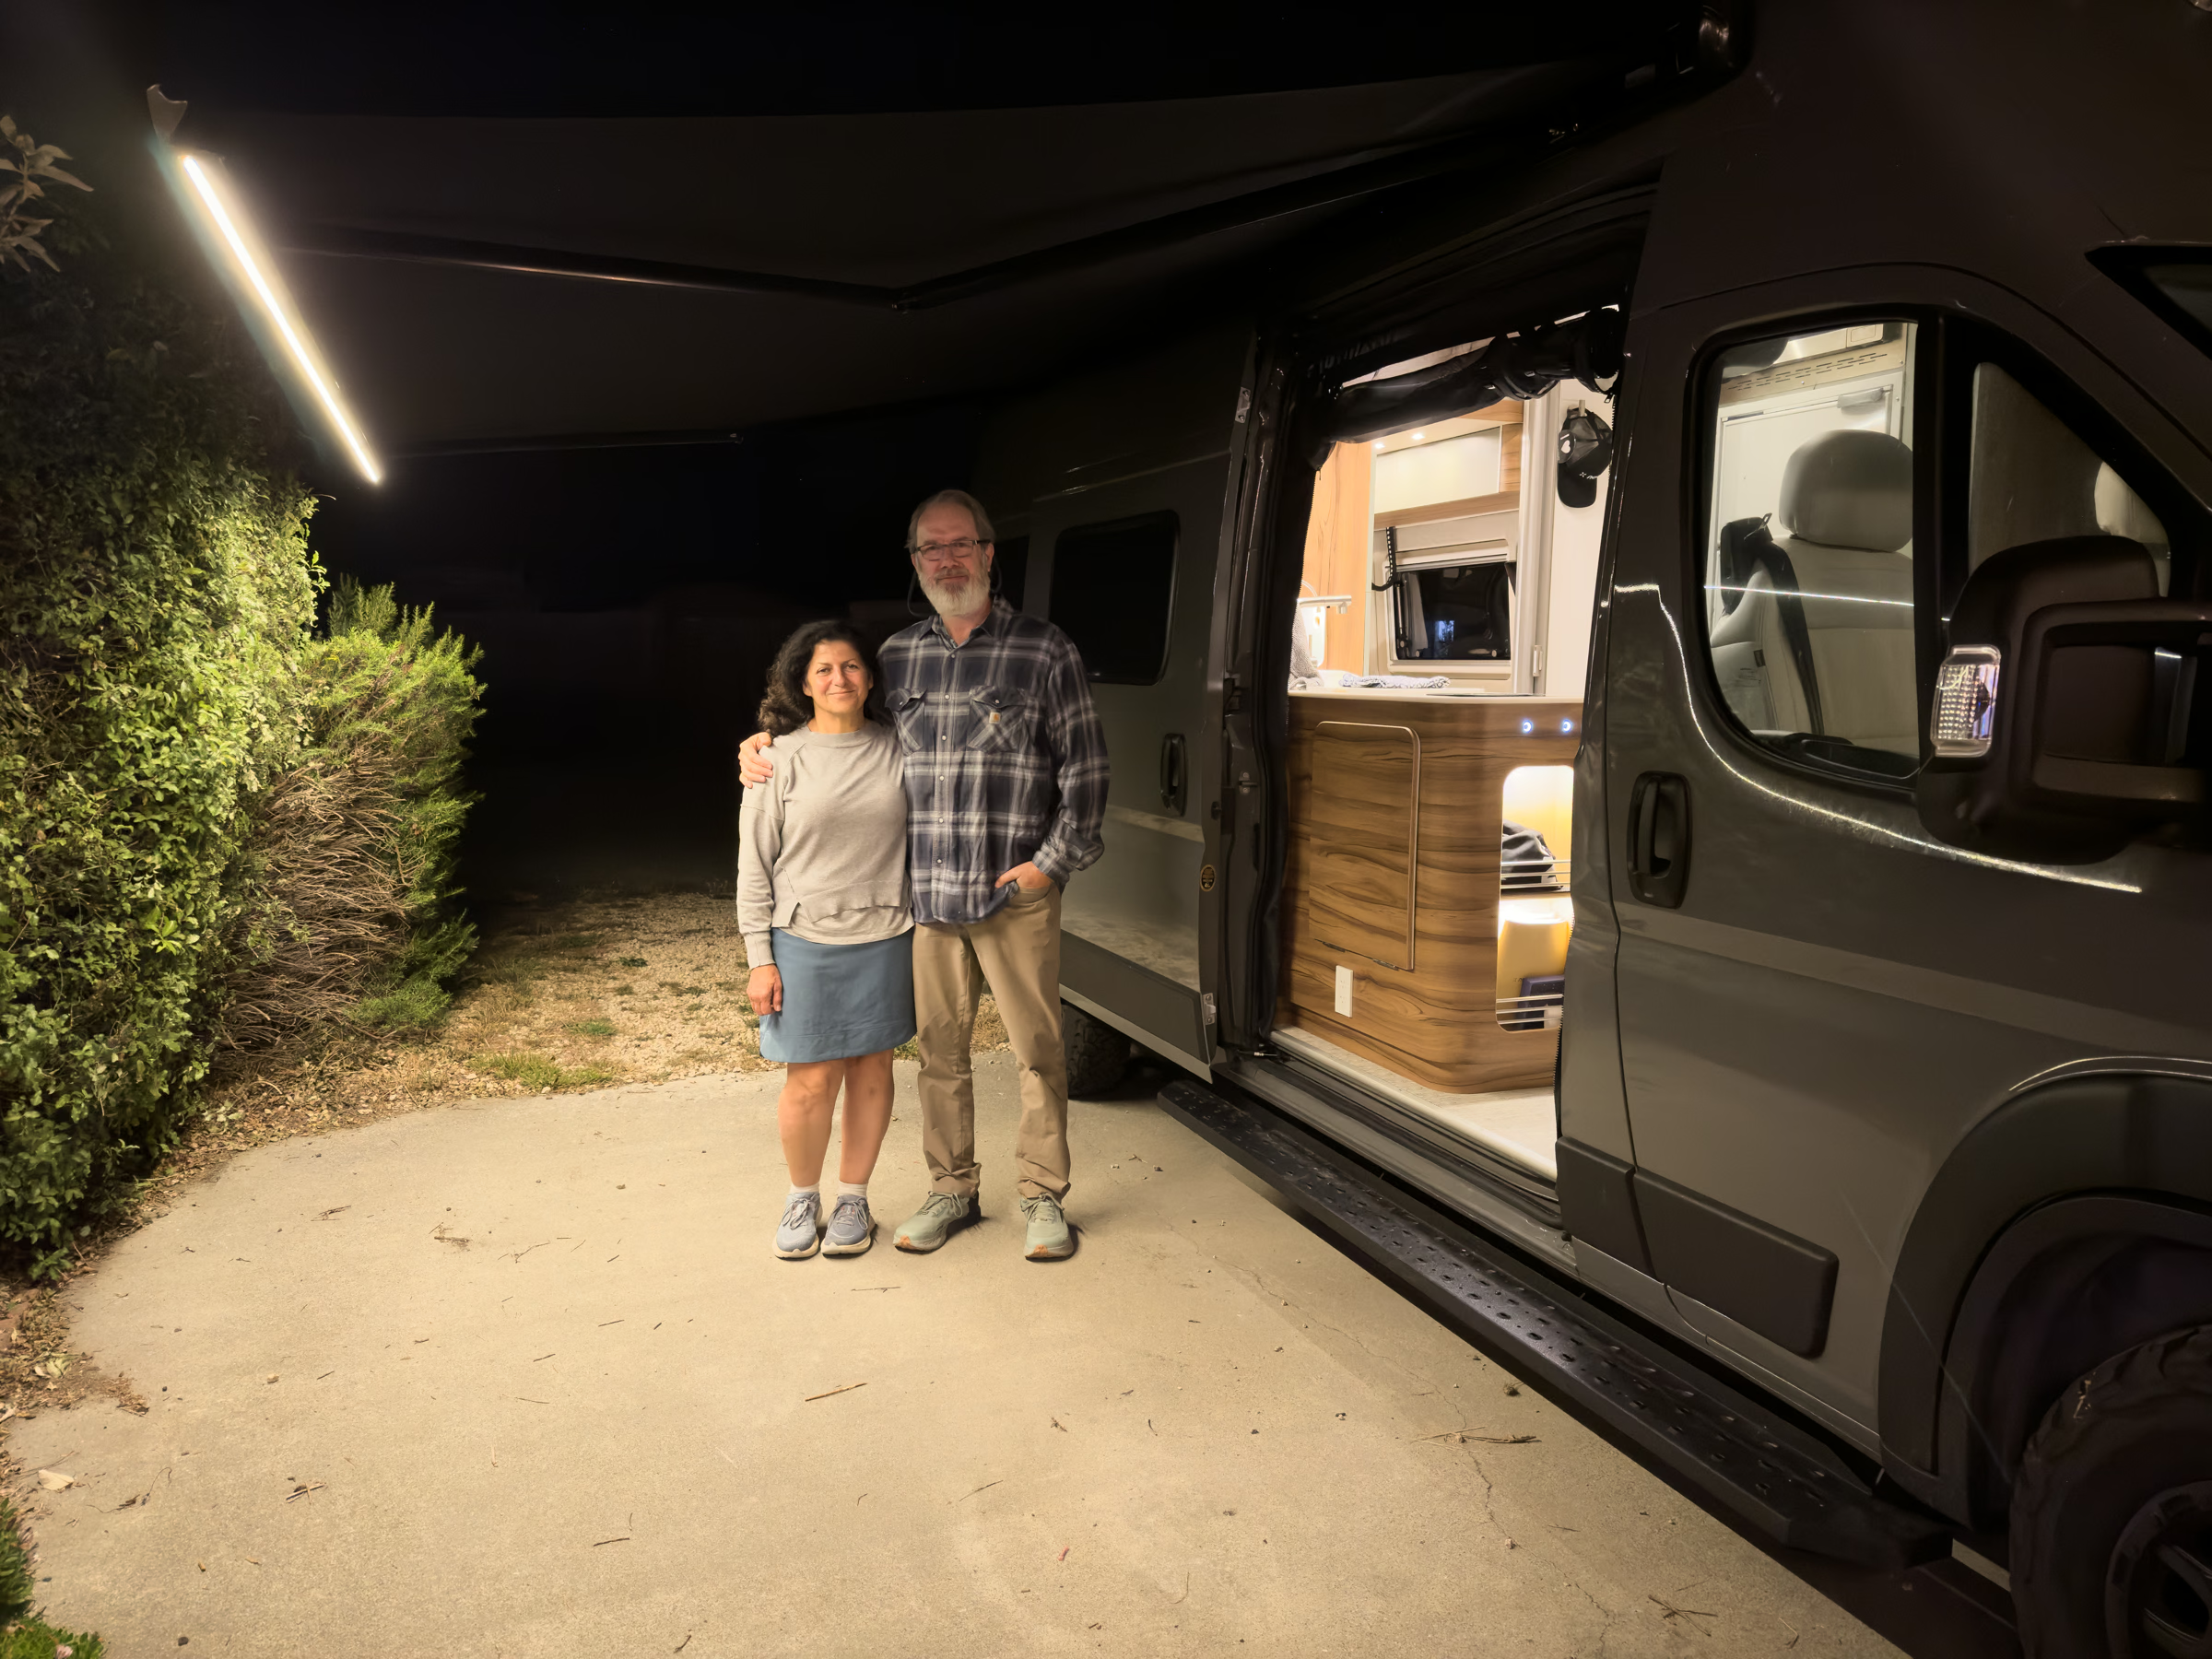
Two things jump out right away. First, on Lori’s face the color is the same all around. Good skin color, not half normal, half ghoulish. Second, the color of the exterior light matches the color of the interior light.
This is what you want. This is what a beautiful, relaxing evening looks like. This is why your phone likely changes to this same sort of color at night, automatically, sending your brain a primal signal, a signal that says “it is night now, it is time to relax next to the fire now,” built-in deep down since the first glimmerings of man.
Are you motivated?
Items you will need
LED strip: PAUTIX COB LED Strip Light Warm White 2700K IP65 12V. Note that this is a COB light–a continuous light rather than a series of closely spaced LED dots. And, despite being waterproof, we are enclosing it in a silicone sleeve. Be sure you get the 12 volt version of the light (the 24v is more common).
Butt connectors: You’ll want the pink ones from a good brand, such as Ancor. Don’t buy no names. The correct ones will typically labeled “Marine Grade” and will have a heat-activated adhesive inside the heat-shrink tubing. I bought a whole kit but you only need two pink ones for this upgrade.
Crimp tool: The butt connectors require a specialized tool to crimp correctly. I bought the Klein Tools version but a less expensive one from Titan is very popular.
Wire stripping pliers. Any decent brand will do, The wires are very small.
Heat gun: Any heat gun will be fine–just don’t melt the wire’s insulation! I picked up this hobby-style unit since I think my wife will be able to make use for her hobbies later on better than the pistol types.
Silicone sleeve: This is the one you want. Note that this is 10mm while the LED strip (above is 8mm). If you get the “matching” sleeve the friction will make it impossible to drag the strip through the sleeve. I know, I tried.
Marine electrical tape: This is insurance–wrap the wires and butt connectors in weatherproof tape for an extra barrier. I used Scotch Super 88. Amazon’s price seems high–buy it or the equivalent at your local hardware store.
Silicone sealant: I used 3M Marine Grade Silicone Sealant 08019.
Latex gloves: Because that silicone sealant gets everywhere and makes a mess if you don’t wear gloves, and maybe even if you do.
Courage (or luck): As you will see.
Step One: Remove the existing LED strip
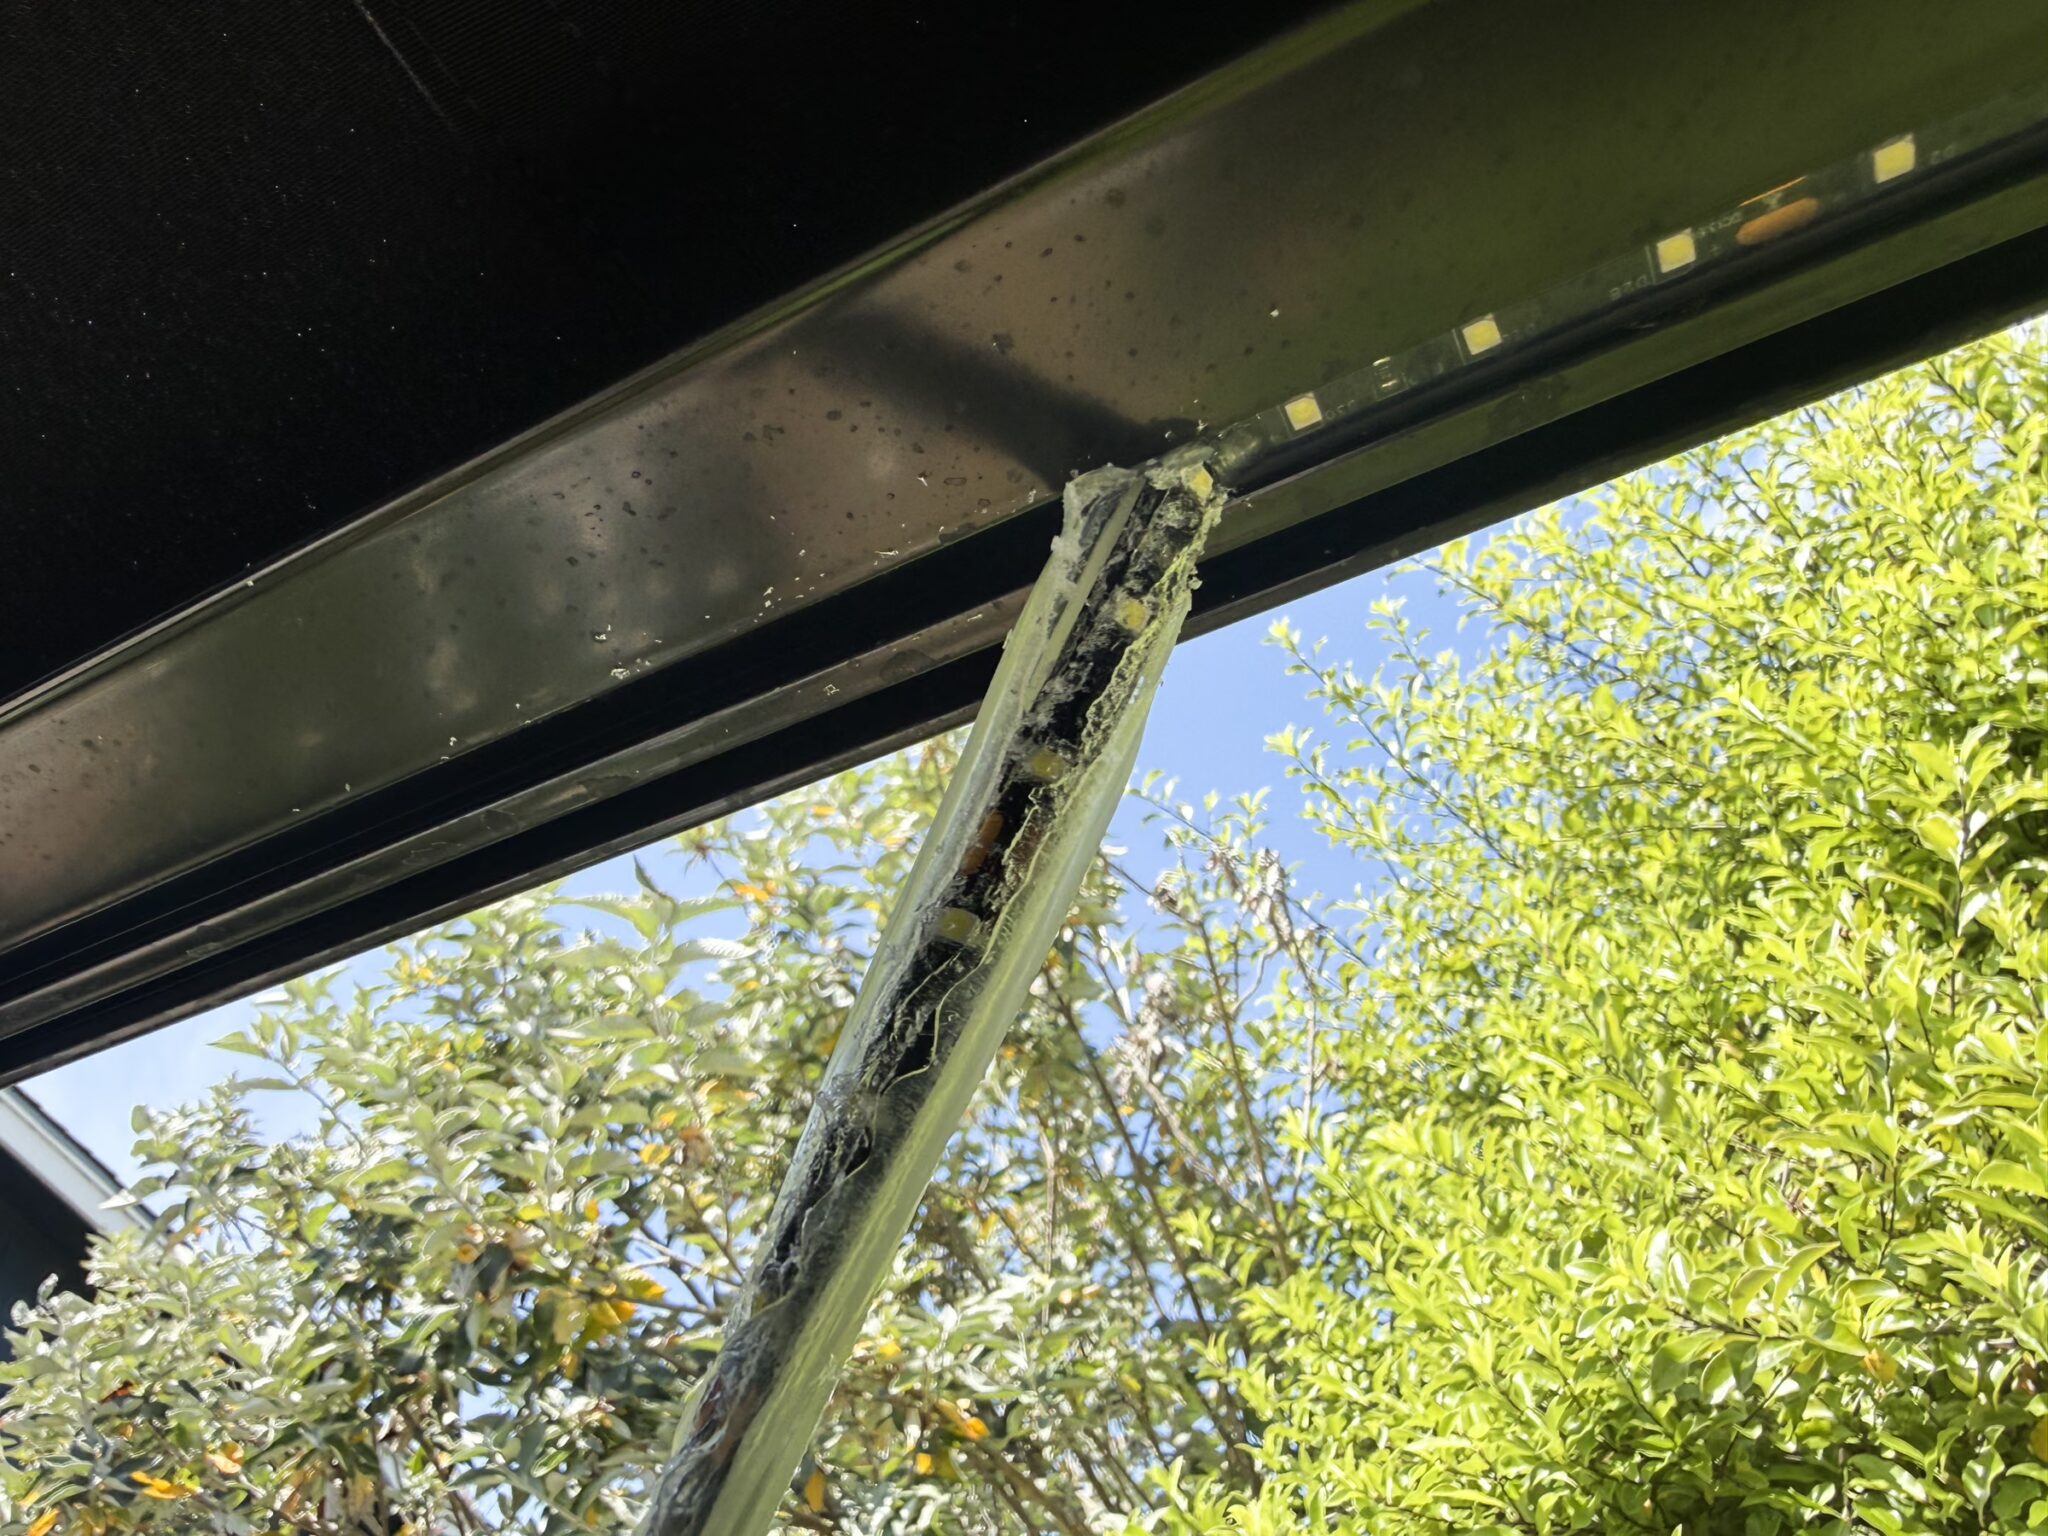
Turn off the power to the van, flip the fuse. Take off the two metal side caps that protect the channel that the LED strip is located in.
The LED strip is inside a protective silicone sleeve. You just have to get a hold of one end (the side without the wires) and pull the sleeve down and out, and the LED strip with it. There will be a lot of crystal-like debris. Wash your hands.
Step Two: Cut the wires
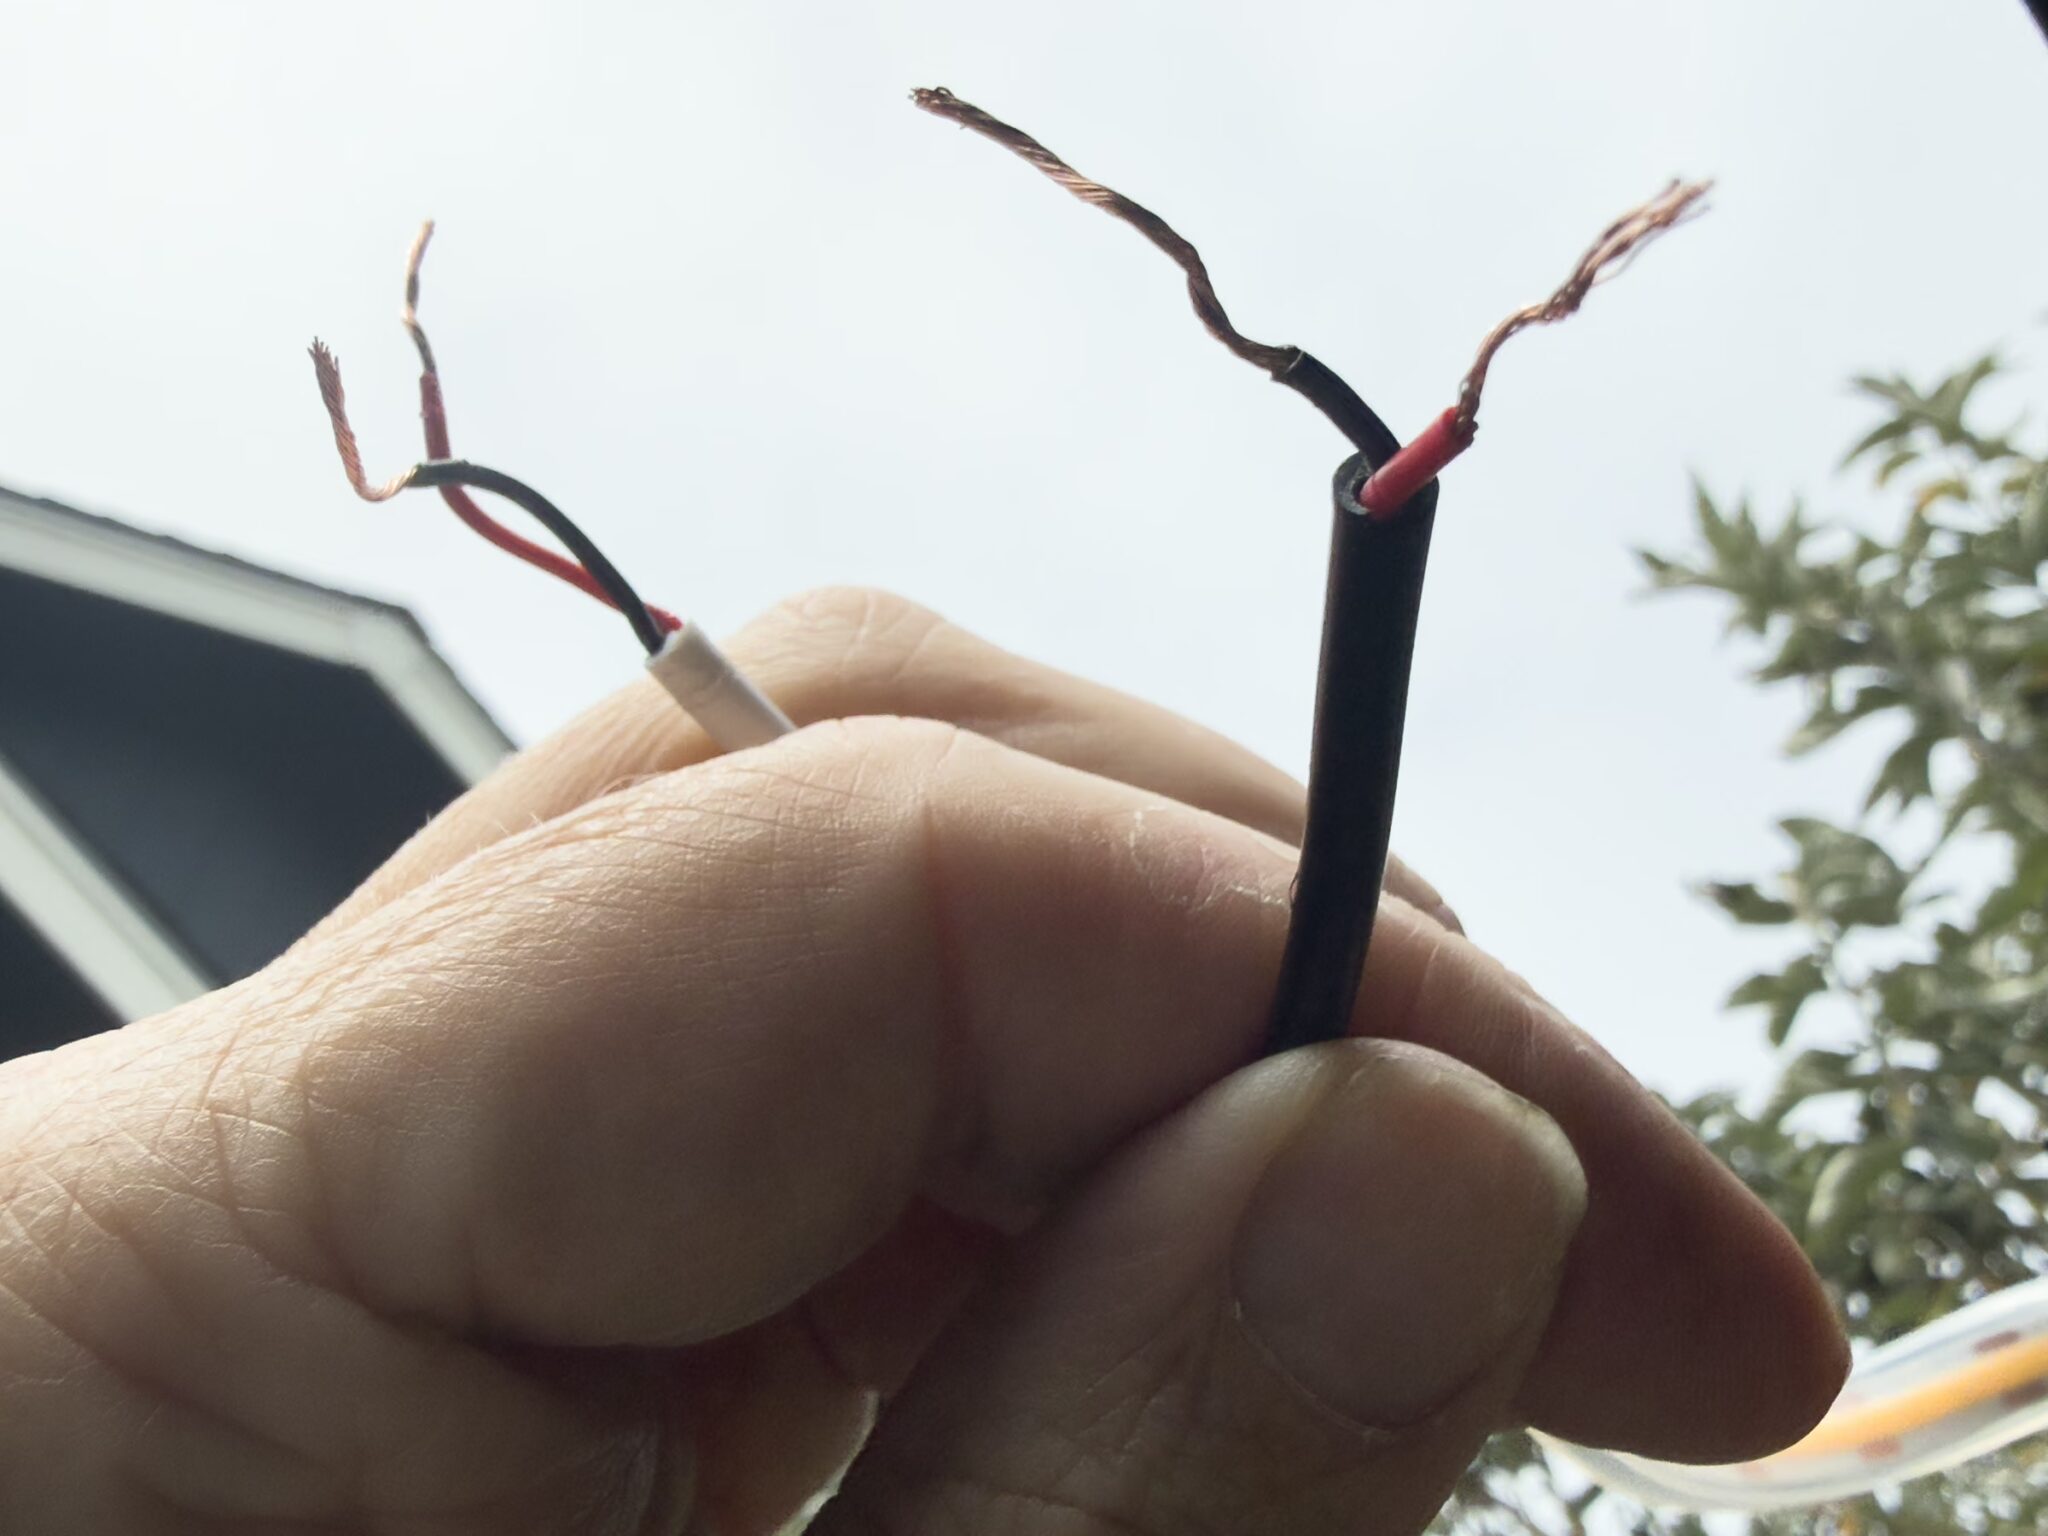
Cut the zip ties that are holding the bunched-up wires to the inside of the awning. Be careful not to cut the wires themselves!
Look at the wires coming out of the van, and you’ll note that there is a quick-connect mechanism. I could not find any warm-white light with this mechanism, so we are going to splice the wires—but don’t lose the quick-connect. Cut the wires up near the LED strip, so you lose as little wire as possible. Throw the LED strip and its silicone sleeve away.
You’ll want to trim the wires now, both on the LED strip and on the quick-connect wire, leaving about a 1/4-inch of bare wire on each. Eventually you’ll connect them with a butt connector, but before you do any of this, test the LED strip—twist the wires together gently (keep the red away from the black) and then turn the power back on and the awning lights on. The new LED strip should turn on. Inspect it, looking for dark areas. If there are dark areas, your new LED strip is defective or has been stepped on by some careless person, and it will need to be replaced.
Turn the power back off.
Step Three: Install a new LED strip and silicone sleeve (two-person job)
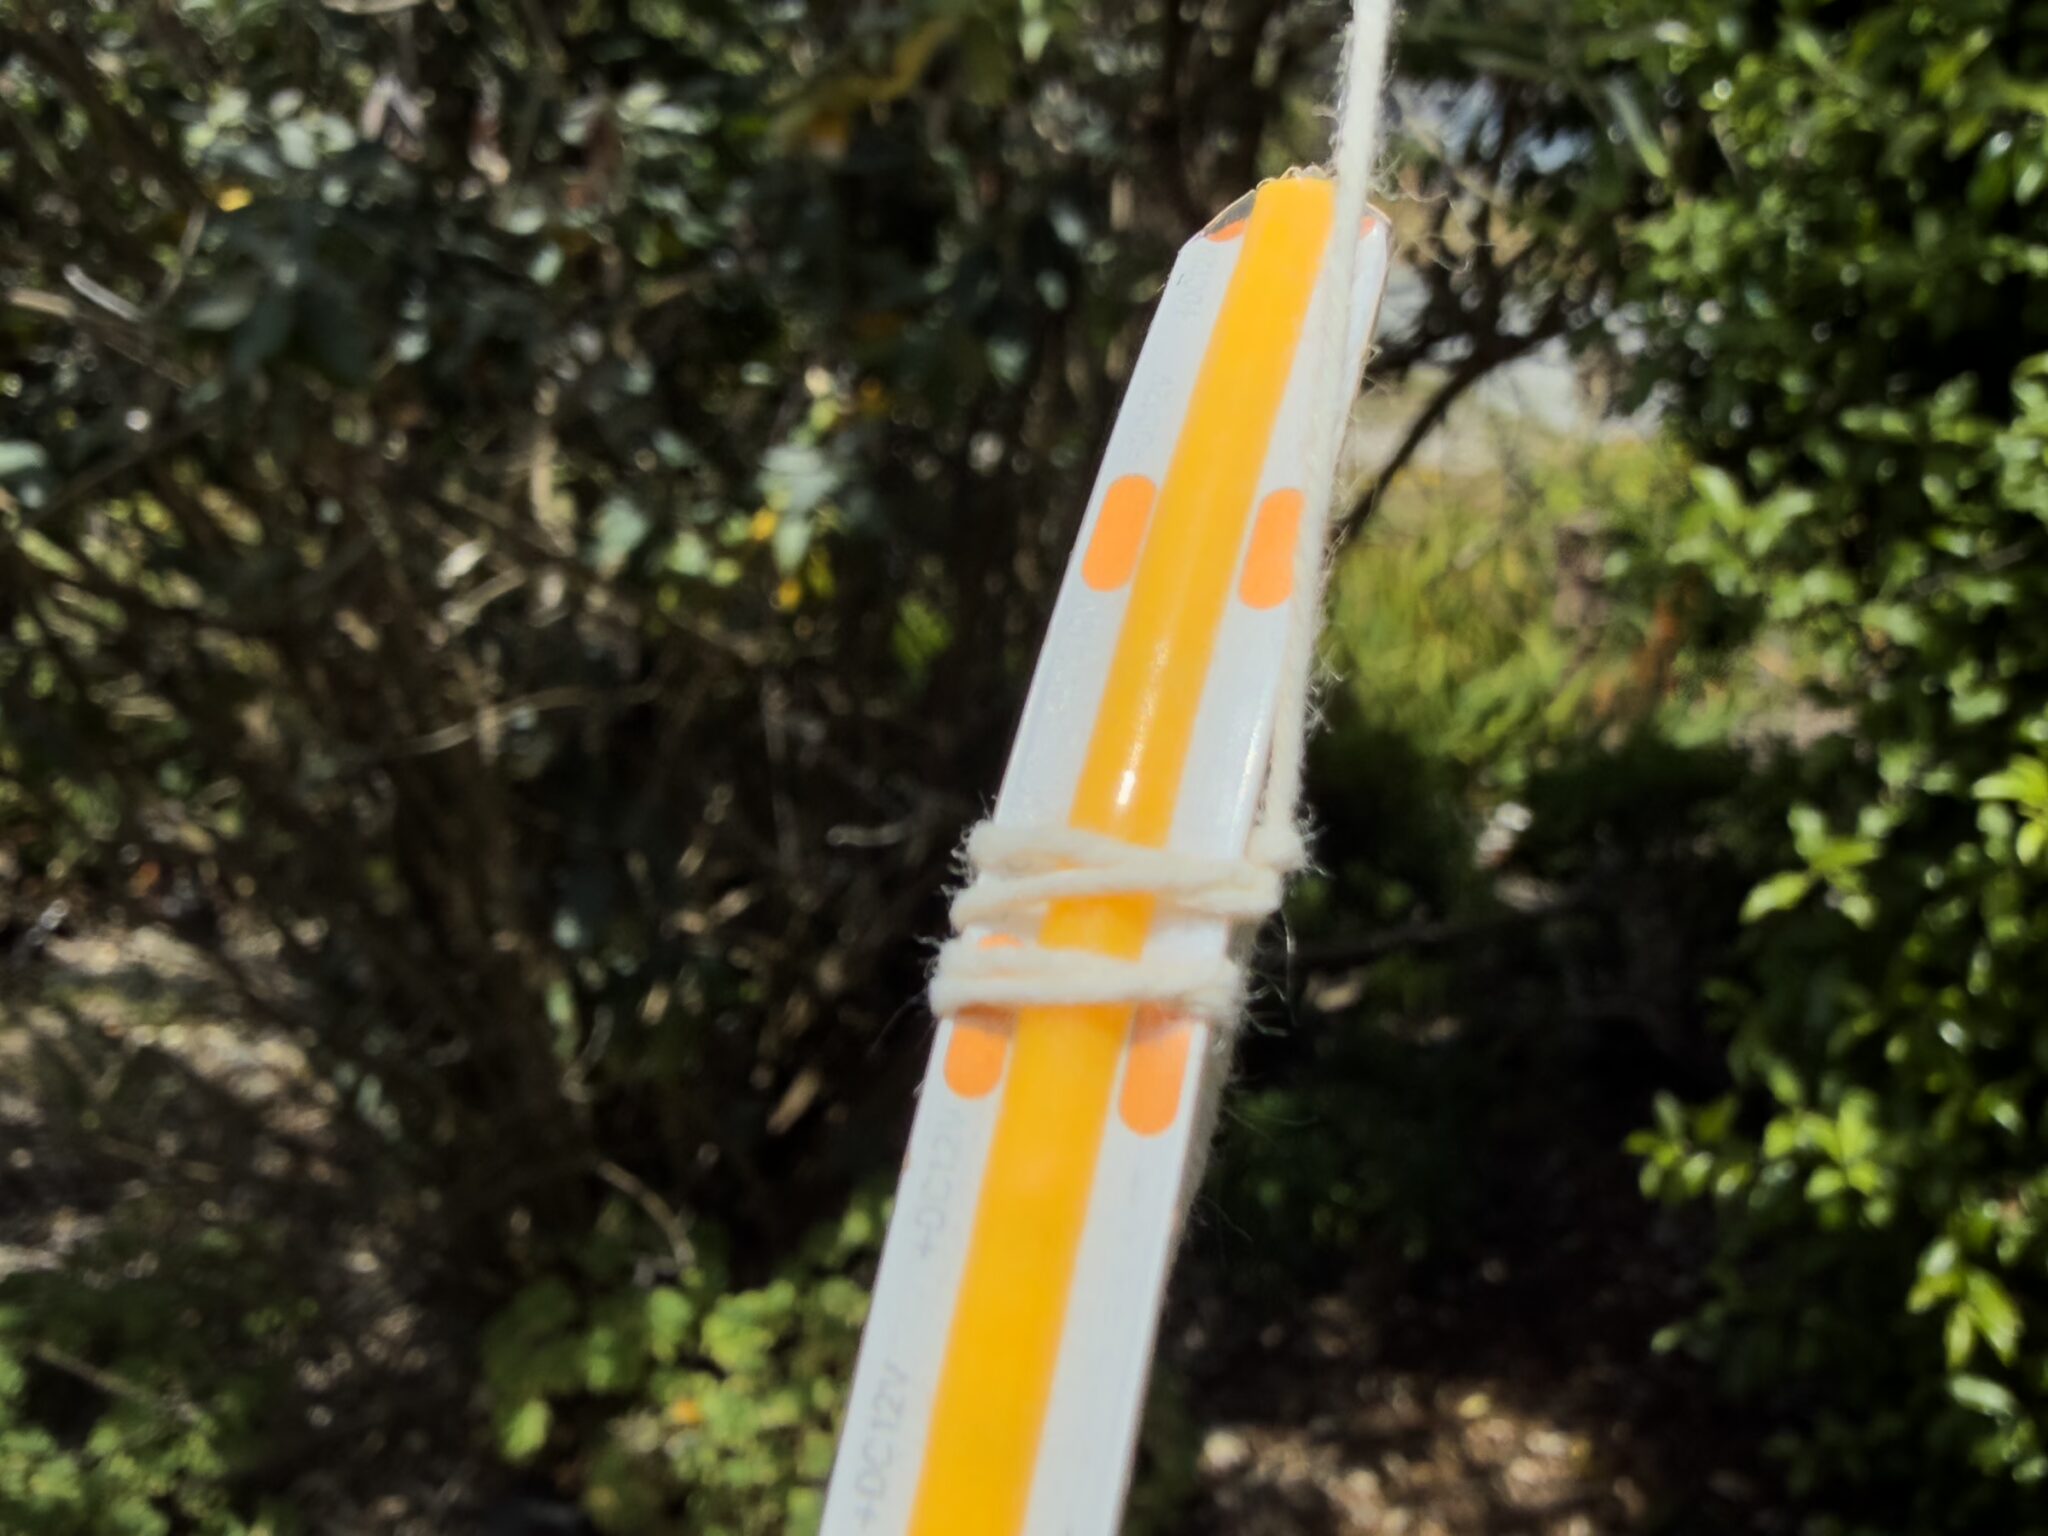
It will be obvious how to install the silicone sleeve—just start at one end and press it into the same channel where you found the factory LED. You’ll have a lot of extra. When fully in the awning, cut it but leave a few feet dangling on each end. You can trim these ends later. Note that you need to take care that the string, which comes pre-installed inside the sleeve, runs the whole length of the sleeve. It will be nearly impossible to put the string back in if you pull it out.
Now that the sleeve, with its string, is installed, you’ll want to insert the LED strip. Be sure to orient it so that the LED portion faces down. Trim away a few inches of the end of the sleeve at the forward side of the awning to reveal the string and tie the string to the LED strip, near the strip’s end, NOT on the side with the wires. Don’t cut a slot for grooves in the LED strip for the string to grab—they will cause the strip to break at the worst possible time. Just do a simple knot. Loop the string a few times for security but don’t leave some giant knot that will get in the way. Trim away a few inches at the other end of the silicone sleeve (don’t cut the string!) to give you (or your helper) something to grab.
Now, have one person guide the LED strip into the sleeve at one end of the awning while the other person pulls firmly and smoothly on the string from the far side. It will be easy at first and then will grow progressively more difficult. Eventually it will grow so difficult that you will wonder if the string will break. Keep pulling. Don’t jerk it—smooth and even. Take a break. If you are working with a friend, use the break to reaffirm your friendship. If your spouse, remind them of your love. If a paid employee, double their pay. This part can be highly frustrating.
(Alternative: I noticed when I removed the Gerard silicon sleeve that they had a wavy slit all down the strip. I’m guessing they simply inserted the LED through this slit–much easier! The issue then becomes how you will seal the slit (probably silicone), or even if you really need to, given the LED itself is waterproof. If I ever have to reinstall the LED, I will explore this more fully.)
When the LED strip is through the sleeve, continue until the end of the LED strip with the wires is about two inches deep in the sleeve, but the wires themselves still stick out, with lots of wire accessible.
Step Four: Wiring the lights
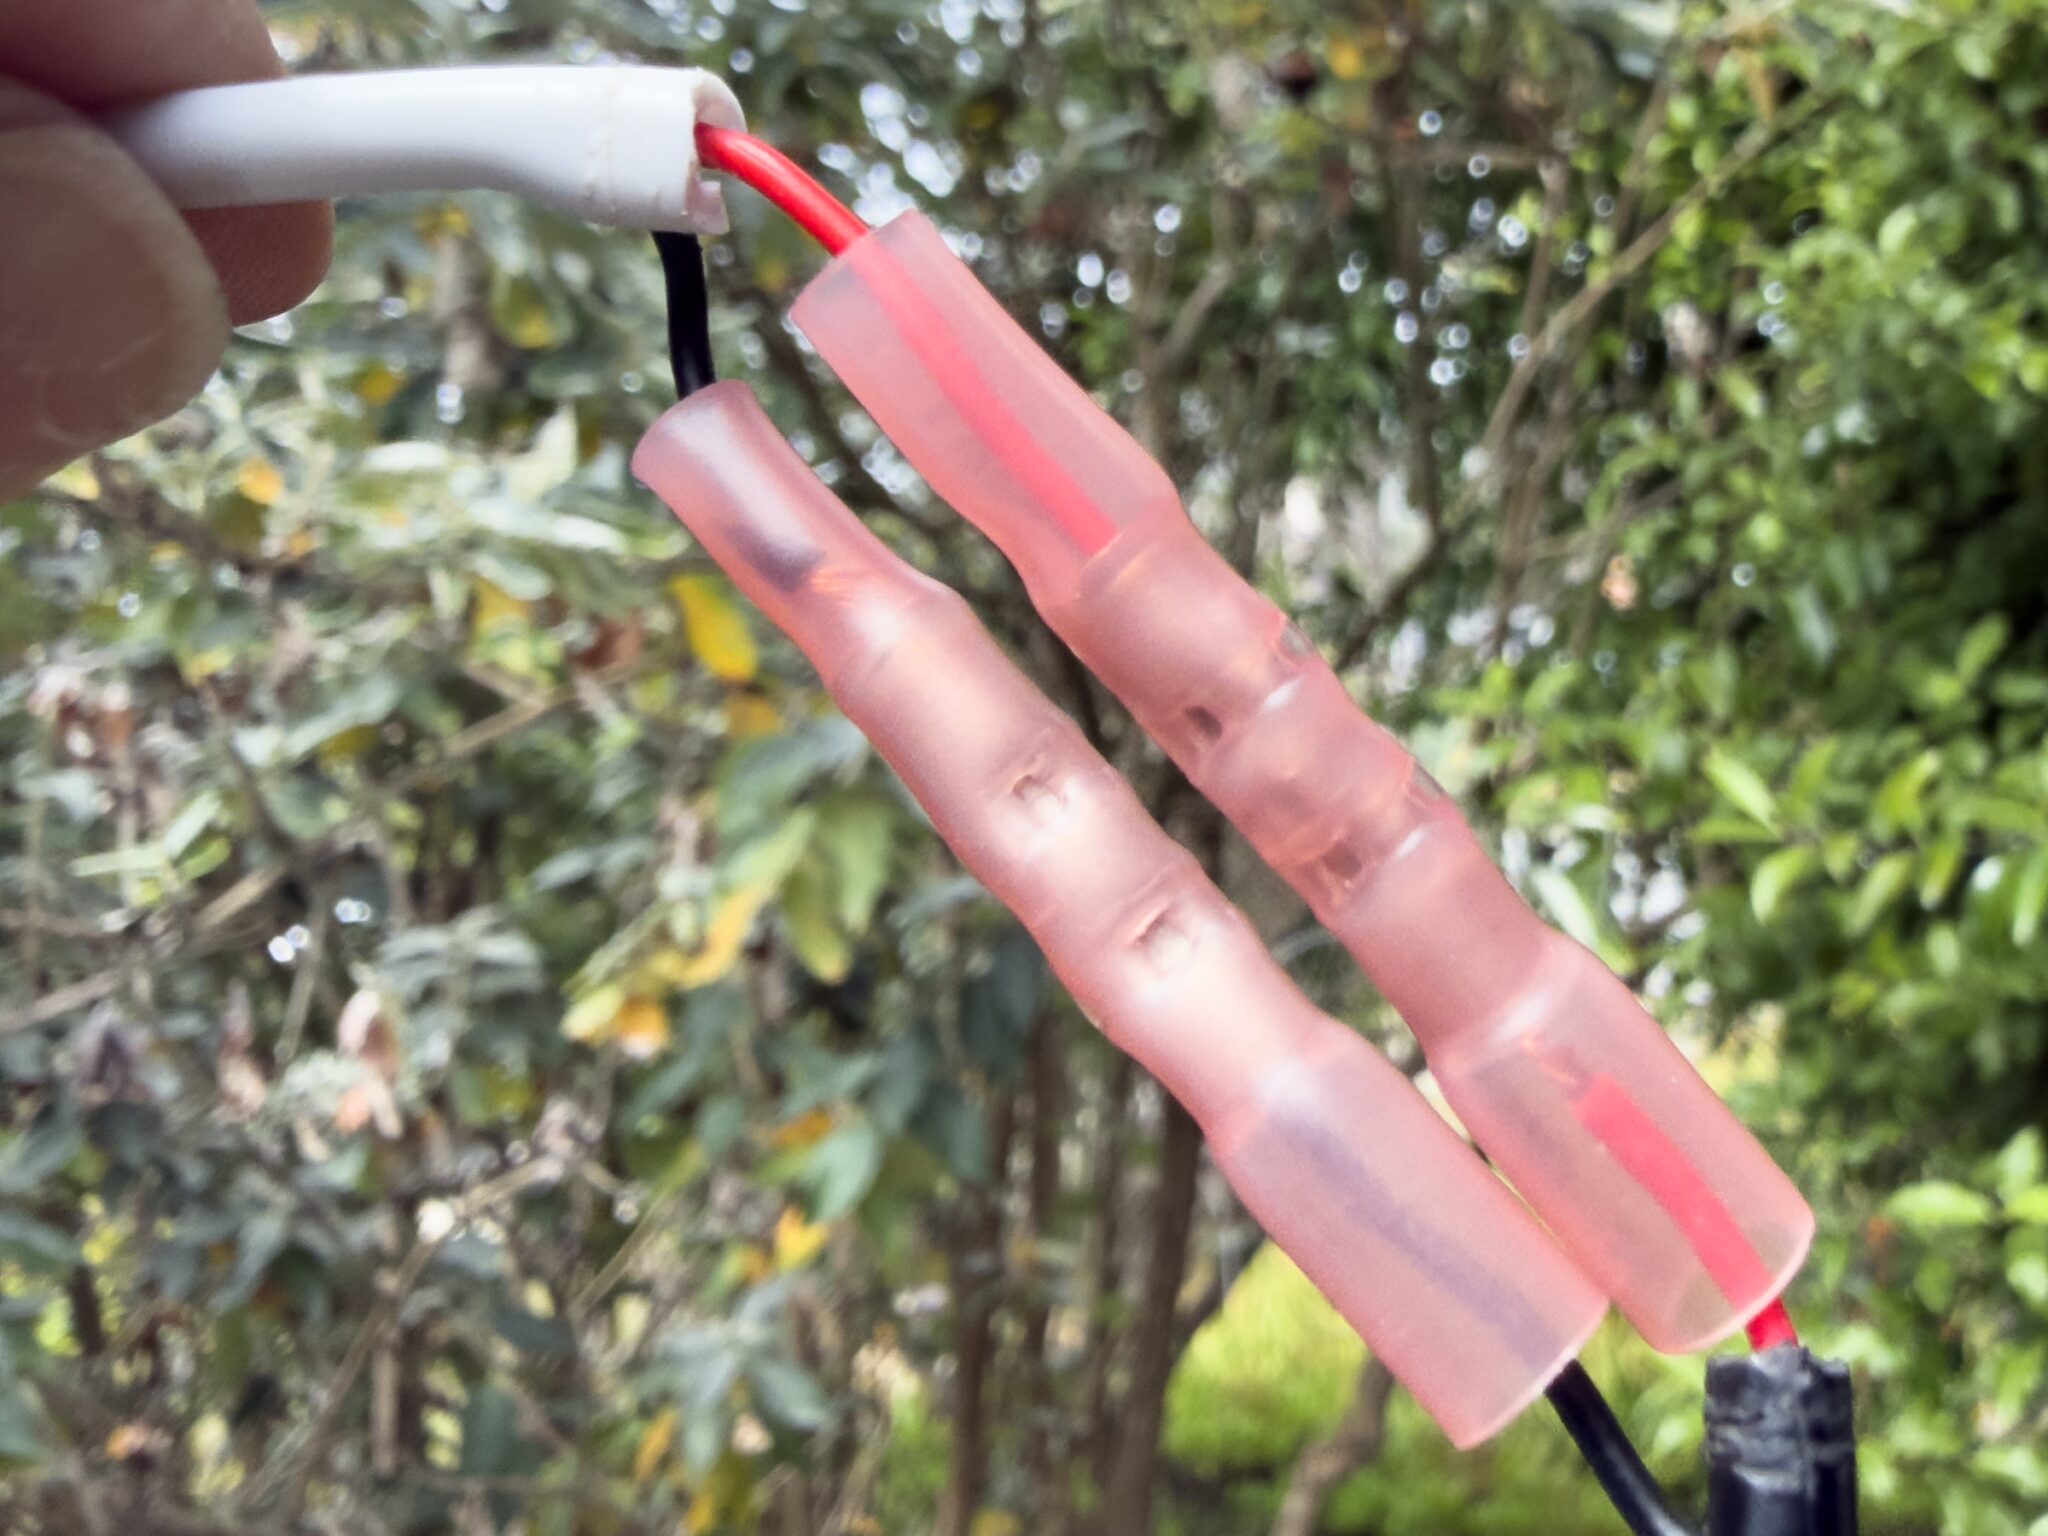
This part is easy. You are going to connect the wires of the LED to the tail end of the quick-connect wire. Instead of twisting the wires together and then using one of those plastic twist-on connectors, we’ll use high-grade butt connectors, apparently popular with boat owners.
A butt connector is a clear plastic sleeve with a copper tube inside. You insert your wires and crimp them tight with a special crimping tool. Then you heat the sleeve with a heat gun, which shrinks the tubing and melts an adhesive on the inside, all of which makes the connector weatherproof. Watch this video to learn how to do all of this (which is what I did): Waterproof Butt Connector Video
Do what they do in the video. It’s easy. For extra insurance, I wrapped the whole connector area with a water-resistant electrical tape. I used Scotch Super 88 for no other reason than that I inexplicably had three rolls of it in my garage.
Step Five: Seal each end with silicone
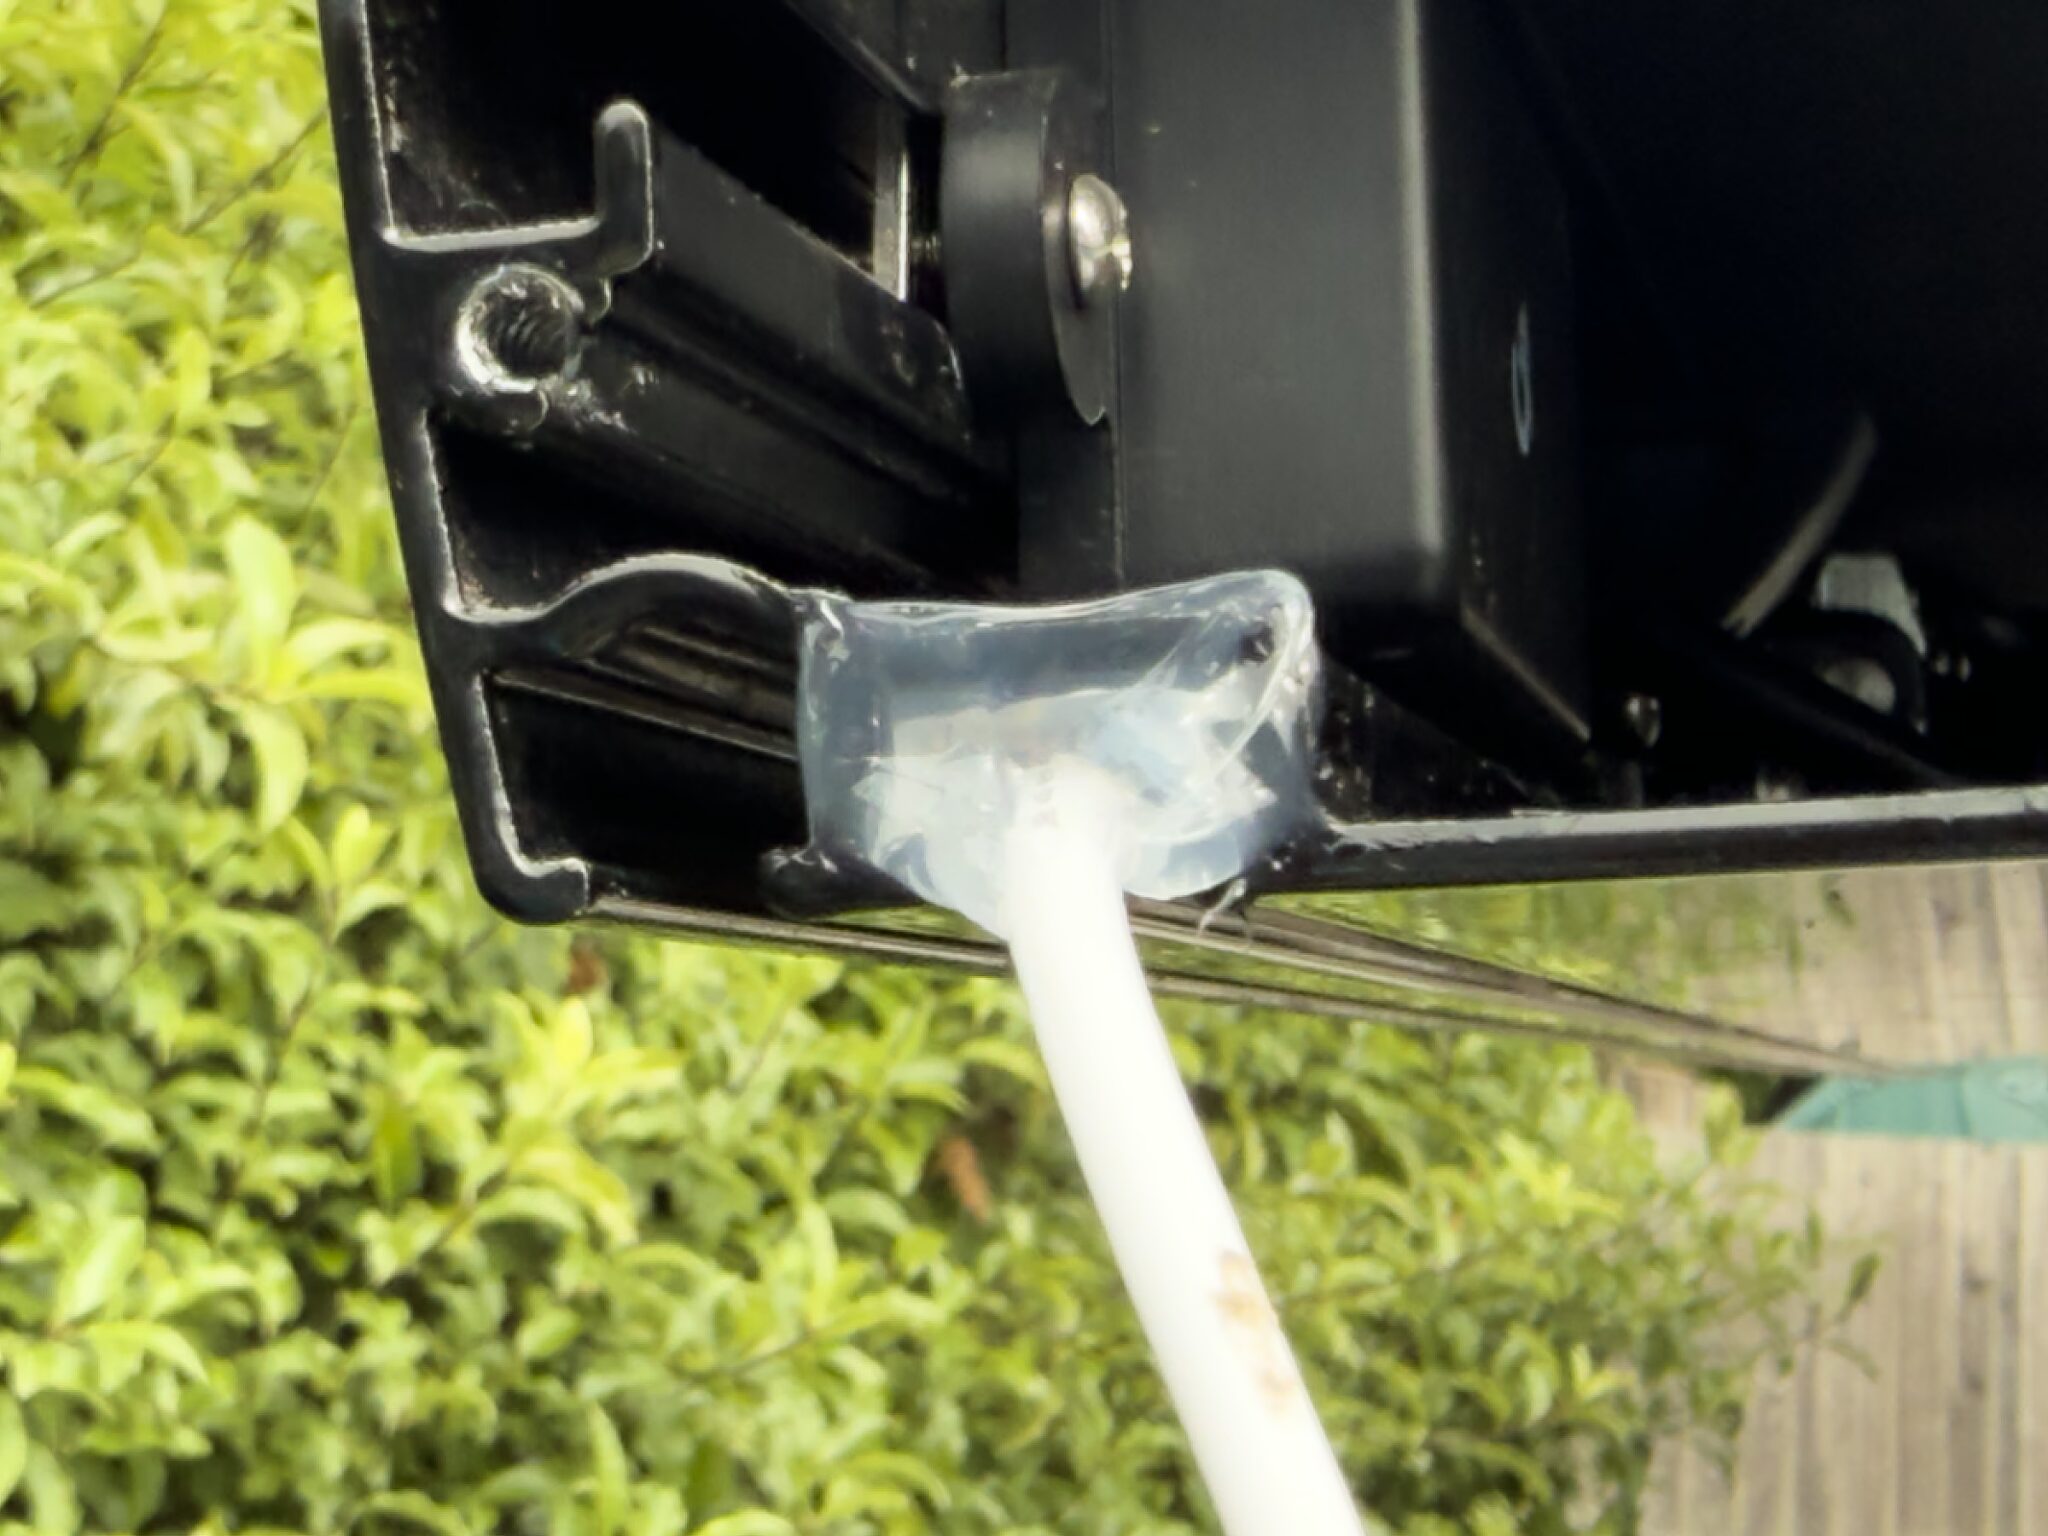
Your LED light is working now (test it again to be sure) but you’ll need to neaten things up and weatherproof it. Confirm that you are happy with the wired end and that the wires go about two inches into the sleeve, then move it so the edge of the silicone sleeve is even up with the edge of the metal channel. Press silicone into the end of the sleeve, trying to fill some of that area inside the sleeve. Add additional silicone to fill all of the space at the end of the channel, forming a “cap” for the channel. Now, at the far end, trim the sleeve and the LED strip (you can cut both) even with the end of the channel on that side, and silicone it in the same way. Despite the LED strip being IP67 (and thus waterproof, even without the silicone sleeve), you don’t want any water getting in.
At this point I decided it would be a good idea if I added silicone along the length of the LED, to ensure that the sleeve could never work its way out of the channel. It is a good idea, but here is where my execution wasn’t as good as I’d hoped for. I used silicone along the channel in four six-inch areas, squirting it into the channel as best I could and wiping it flat with my finger (wear latex gloves when working with silicone—it gets everywhere). For an added bonus, I put down blue tape to keep any smears from overflowing silicone off of the awnings’ metal.
What did I do wrong? Two things. First, I should have used a flat piece of stiff cardboard to flatten the silicone. As it was, after I removed the tape, I saw that there were silicone “ridges” along each edge of the tape, which caught the light. Not good. Compounding my error, I then attempted to fix the ridges using my finger, making a small annoyance into a small, ugly mess. Don’t do this.
Worse, somewhere during all of this, after I turned the LED back on, I saw that there were two dead areas in the LED strip. Not large, each about the width of my shoe, which is no coincidence because earlier I had stepped backwards when I was dealing with inserting the LED strip into the sleeve and stepped on the lights. This is why you should test your lights in Step Two, rather than much later, as I did. Perhaps I will redo this whole LED install with a fresh LED strip at some later date, alas.
Let it all dry and wait for the silicone to firm up strong. Then gather the wire neatly, and fasten it to the inside of the awning using small zip ties. There is a single zip tie mount already installed, but you can add more if you like.
And you are done.
Your Noovo is now beautiful in every aspect.